Installation and configuration – FirstSpirit rsync deployment
Using rsync deployment, you can publish content created with FirstSpirit via the rsync protocol. Rsync deployment is already available in the FirstSpirit Cloud and can be used right away.
In FirstSpirit other content publishing options, besides the rsync functionality, include publishing content within local file systems or using FTP. These two methods are less convenient and secure than rsync:
- After distributing content in local file systems, the content must be processed manually.
- FTP is no longer considered secure enough and should only be used within local networks.
Both problems are solved by rsync deployment:
- The rsync protocol uses the SSH protocol with public key authentication to secure the connection to target servers outside the FirstSpirit Cloud.
- It can process large amounts of data efficiently and economically: if only a portion of the content has changed, the transfer will include just the necessary delta.
The target server needs to be able to accept SSH connections. The correct configuration and operation of the target server, however, strongly depends on its operating system.
rsync deployment task
To use the rsync functionality, you must add the rsync action in the ServerManager and configure the connection parameters.
- As project admin, add the rsync deployment action in the ServerManager.
ServerManager > Project > Properties > [Project selection] > Schedule management > [Edit schedule entry] > Actions tab > Add > Deployment over rsync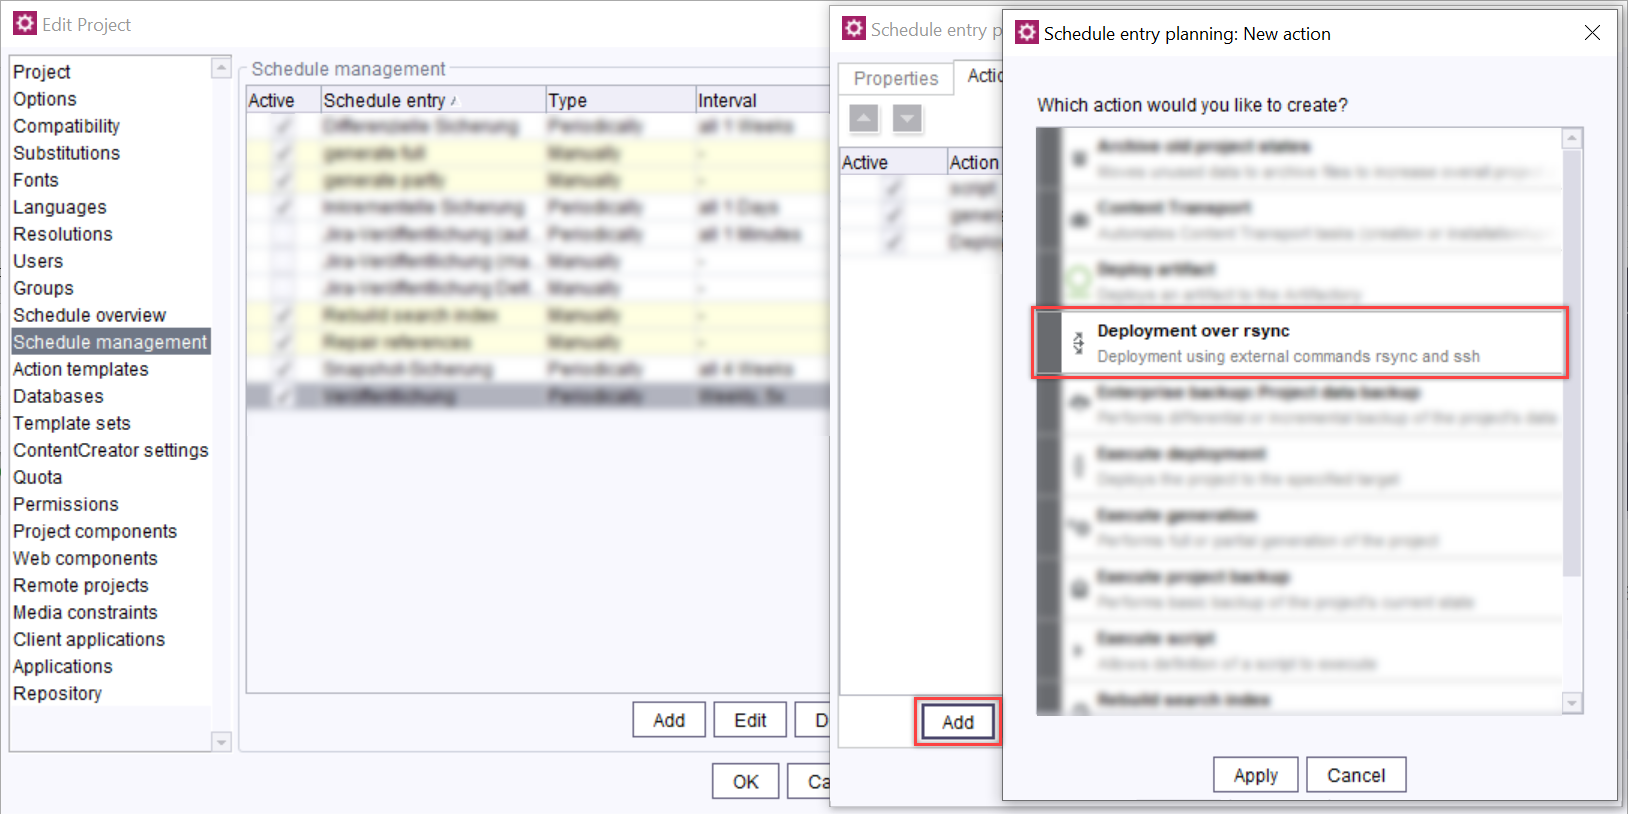
- Configure the Connection Parameters area in the configuration window:
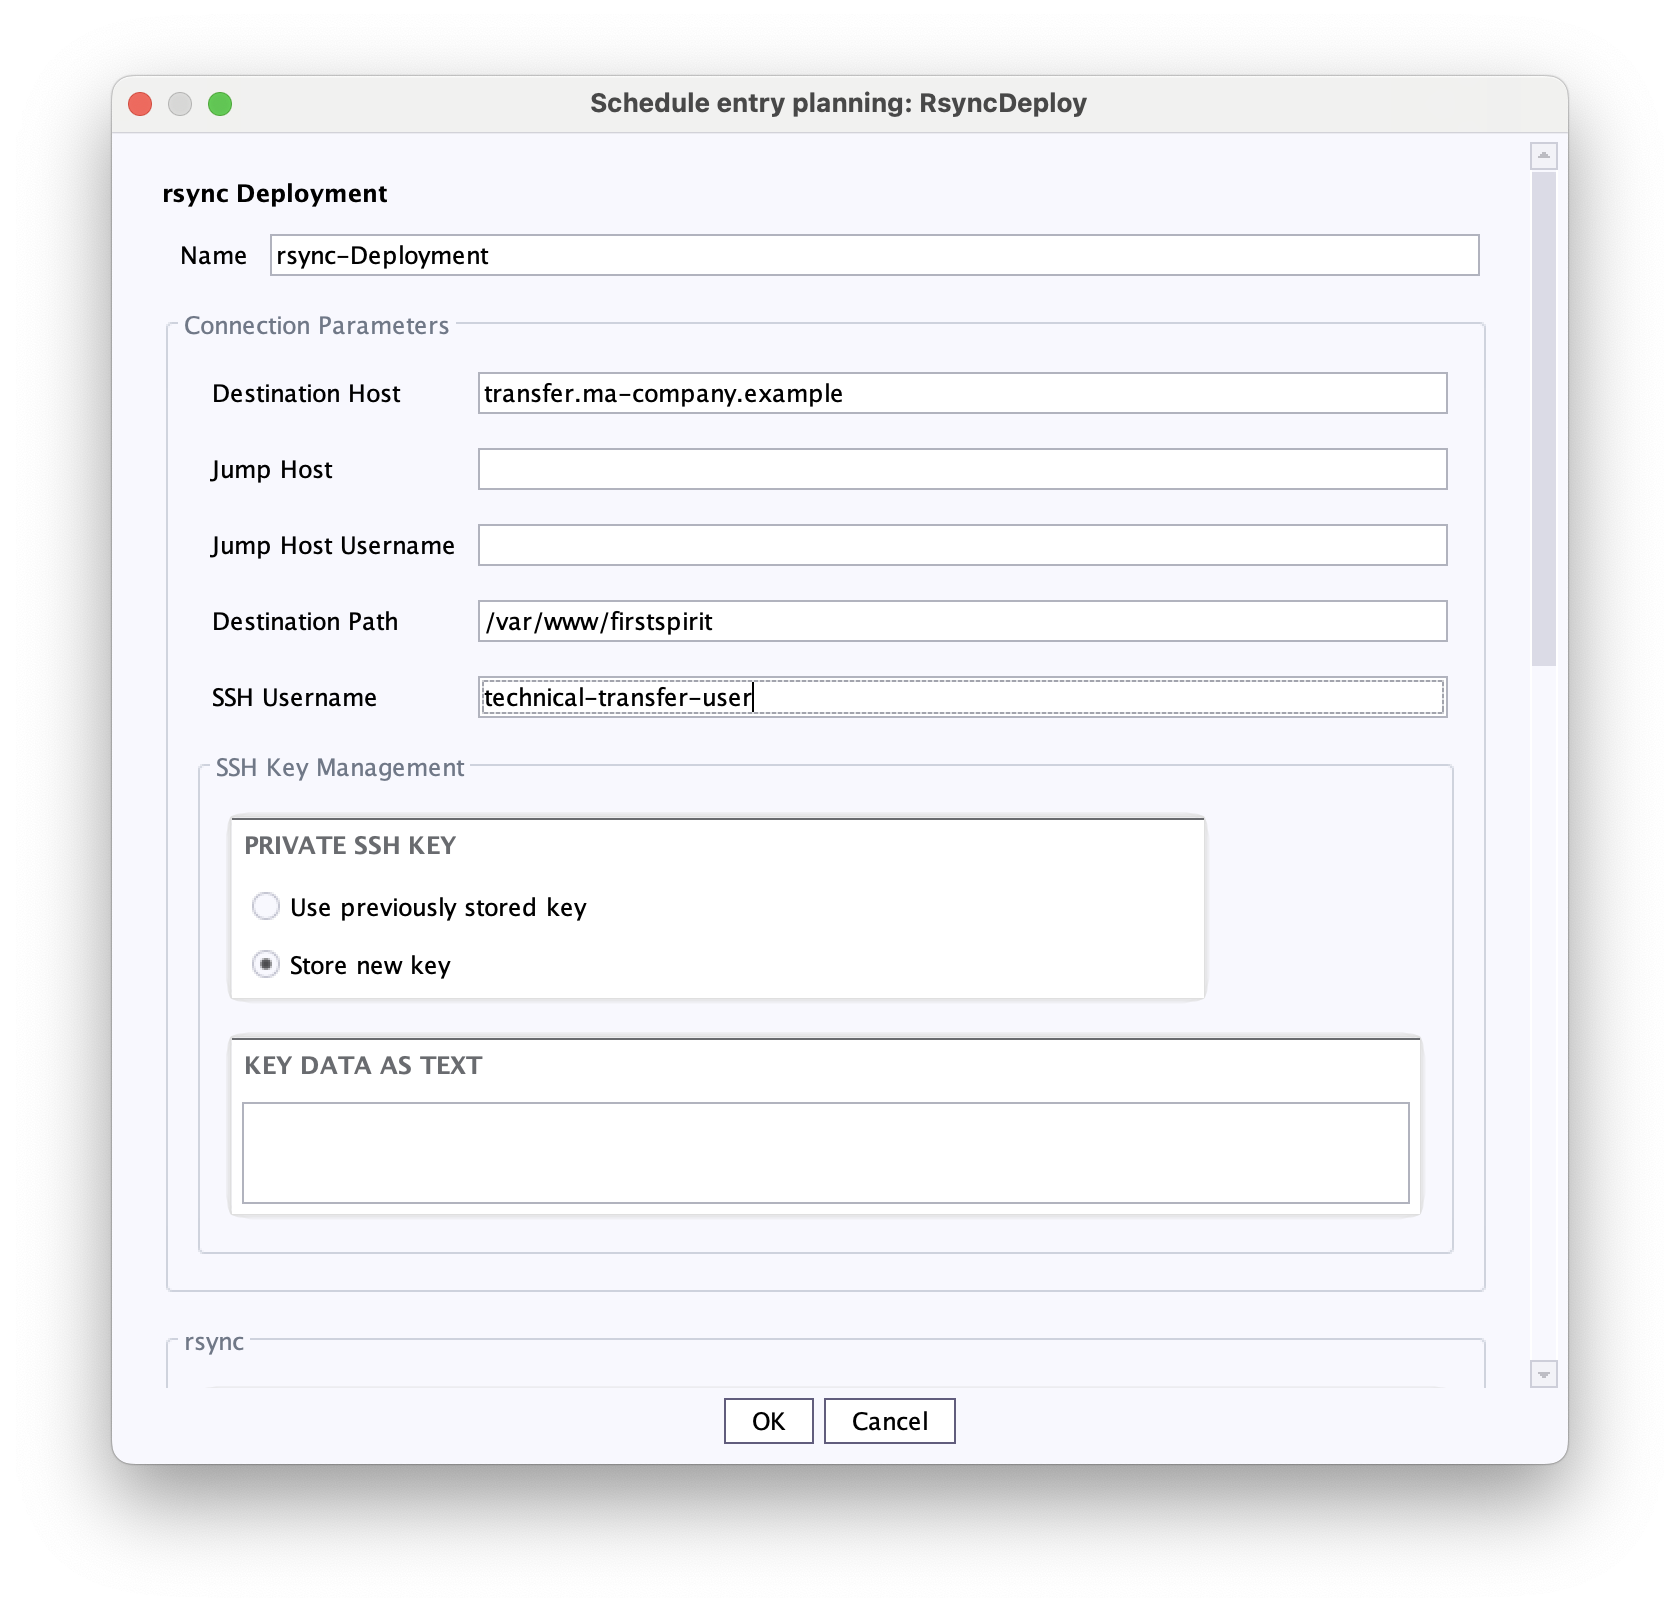
Mandatory fields:
- Destination Host
- Destination Path
- SSH Username: Username for Login
Optional fields:
- Jump Host
- Jump Host Username
Field SSH Key Management
- Enter the private SSH key for the connection under Key data as text.
Note: After saving, the private SSH key will no longer be displayed in this window but will still be present in project data and exports.
First connection
For a secure connection, the public key's fingerprint on an SSH server must be checked each time a connection is established. If a mismatch is detected, the connection is rejected. You must therefore save the fingerprint for each SSH server.
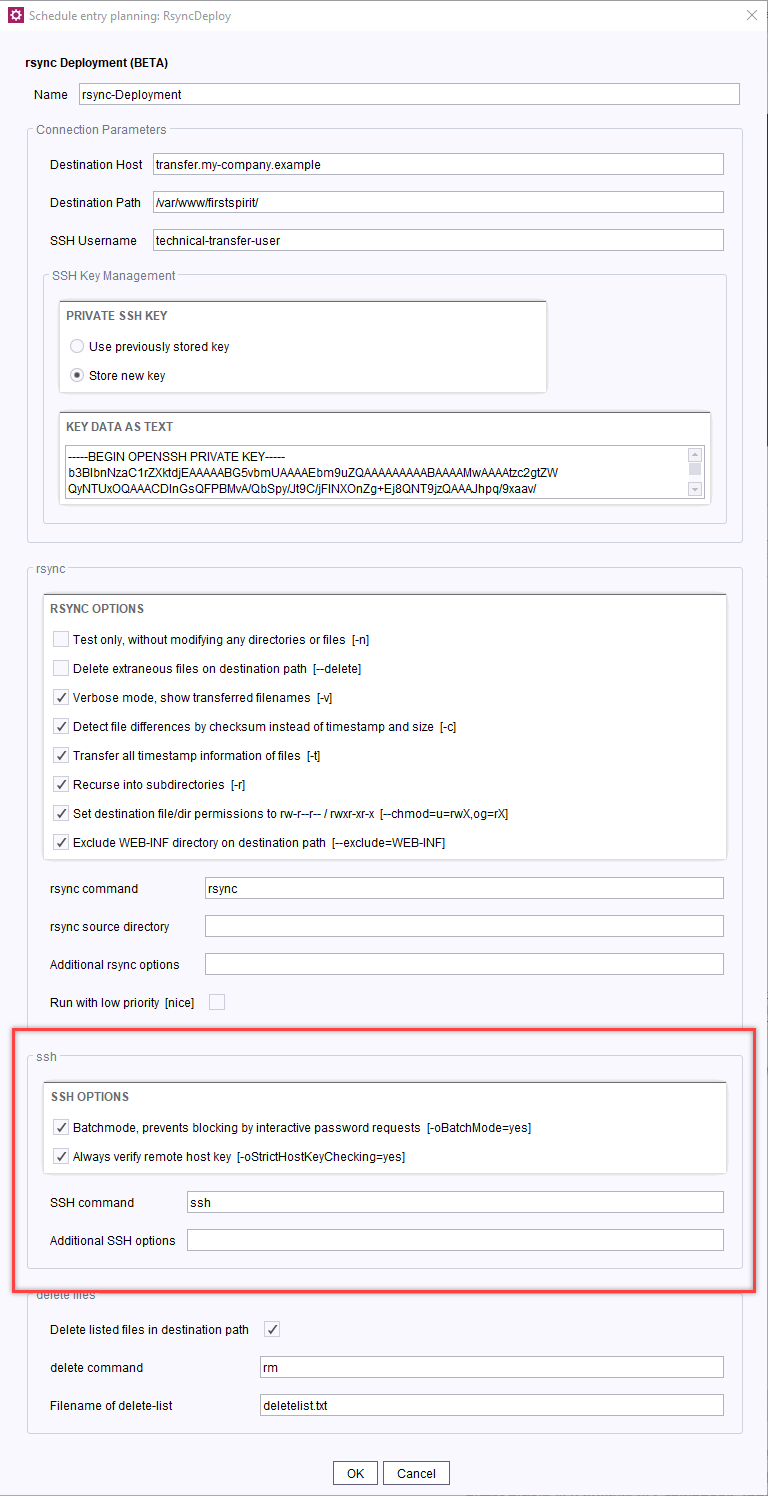
StrictHostKeyChecking=accept-new will be set automatically.Thus, before establishing the first connection deactivate the corresponding parameter in the ssh area, establish a connection, and re-activate the parameter immediately afterwards. Repeat the steps for every first connection to a Cloud server:
|
|
|
StrictHostKeyChecking=yes.Public SSH keys usually do not change. If a public SSH key needs to be replaced, e.g. when retiring old RSA keys, create a ticket with Crownpeak Support.
Deleting files
Several use cases for deleting files are realistic, e.g. fully synchronizing the file structures between the source and target server, or manually deleting directories or particular files on the target server.
To fully synchronize the file structures:
- Activate the Delete extraneous files on destination path [--delete] checkbox in the rsync area.
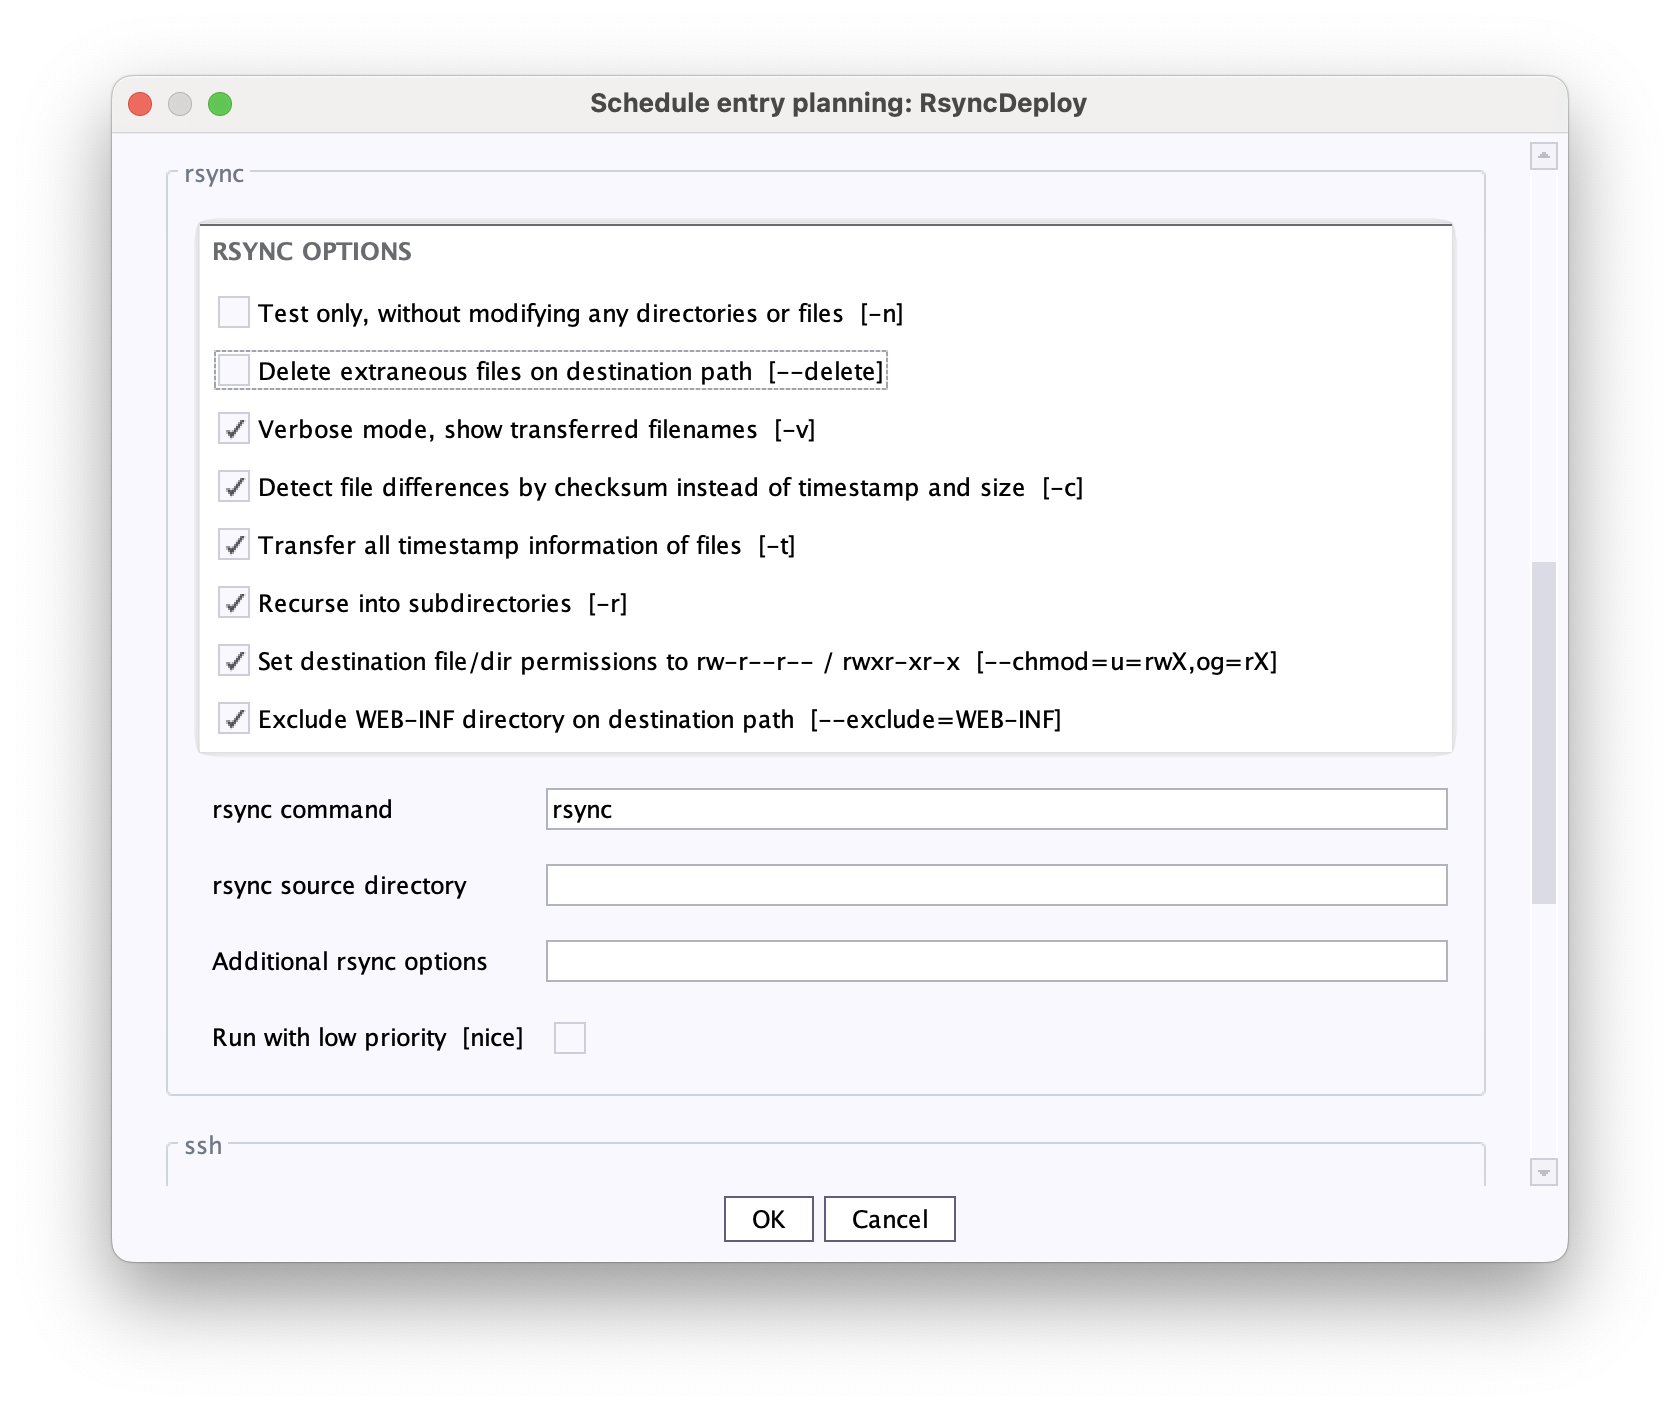
The checkbox is inactive by default.
→ When the rsync action is executed, directories and files are deleted if they exist on the target server but not on the source server.
To delete individual files:
- Activate the Delete listed files in destination path checkbox in the delete files area.
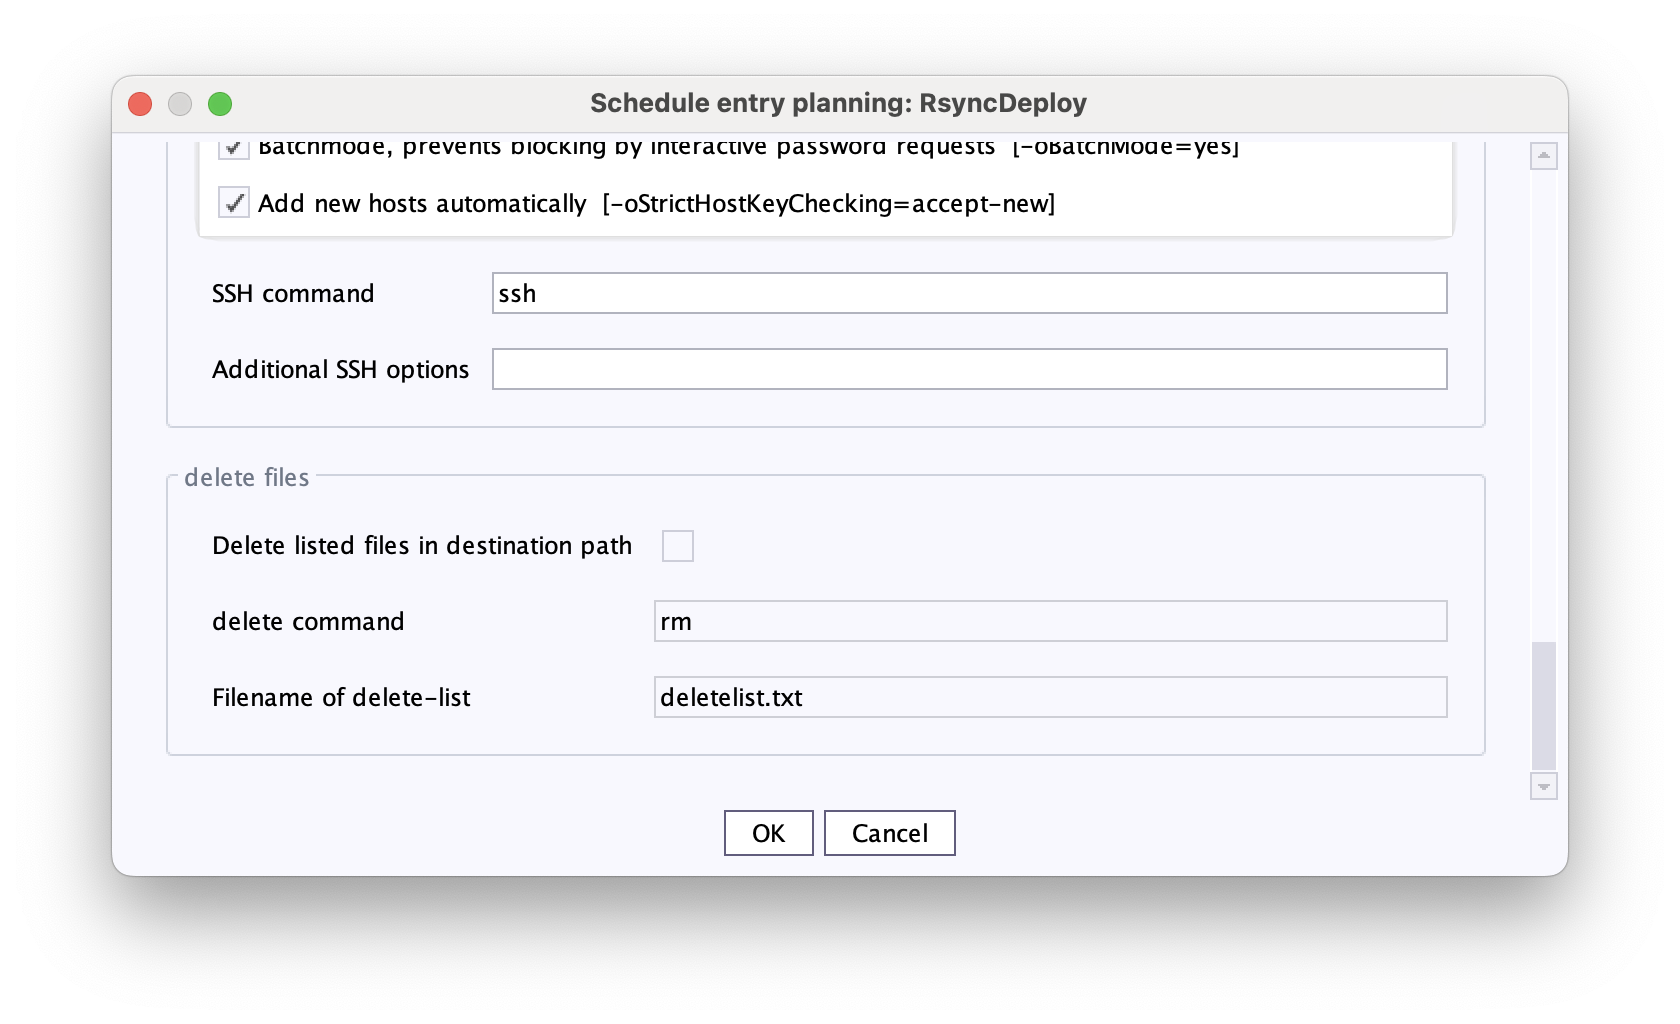
- Enter the delete command for your target system in the delete command field.
E.g."rm" for Linux servers. - Create a .txt file - the deletion list - with the paths of the directories and files to be deleted.
- Place the deletion list in the directory that you specified in the Destination path field in the Connection Parameters area.
- Enter the file name including the file extension in the File name of delete-list field in the delete files area.
E.g."deletelist.txt".
→ When the rsync action is executed, directories and files listed in the delete list are deleted.
- if the Delete listed files in destination path checkbox is active, but no matching deletion list can be found in the directory that you have specified in the Destination path field in the Connection Parameters area.
- if a file or directory listed in the deletion list cannot be found on the target server under the specified target path.
