
User documentation – Multisite Management
What is Multisite Management?
Multisite Management enables your company to distribute FirstSpirit content to all FirstSpirit projects of an instance. This allows you to reuse individual files or entire sections of a project in another department or branch.
This can e.g. help a parent company to keep the legal information of subsidiaries up to date or make new marketing material available to subsidiaries in other countries.
Concept: Distributing content
All content to be distributed to another FirstSpirit project is collected in a package - a bundle. This bundle is distributed to the selected FirstSpirit projects.
The bundle content is copied from the source project and transferred to the destination project. At the receiver, the contents are pasted into the project. If necessary, the structure of the target project is extended. If an older version of a transferred element exists in the target project, it is replaced by the transferred element.
Calling up Multisite Management functions
You can reach the Multisite Management functions via the suitcase icon.
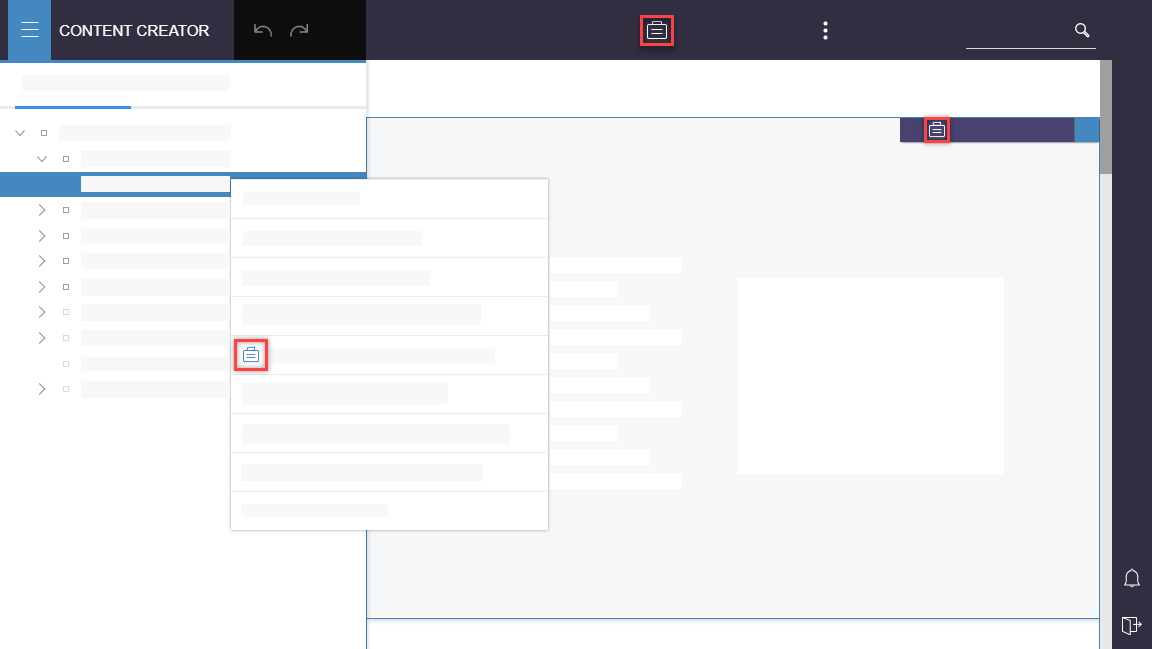
- In the elements' context menu within the navigation area
- In the easy-edit toolbar of individual elements within the page preview and within data and media management
- Multisite Management main application in the main menu
Adding content
- Click
 in an element's context menu in the navigation pane to add an entire page or
  in the easy edit toolbar within page preview, media management, or data management to add a single element.
→ A pop-up opens.
Adding an element to an existing bundle
- To add the element to an already created bundle, select the required bundle from the drop-down list in the pop-up's Existing bundle tab.
- Confirm with OK.

→ The pop-up closes. The element is located in the selected bundle.
Adding an element to a new bundle
- To create a new bundle and add the element to it, enter the required information in the pop-up in the Create bundle tab.
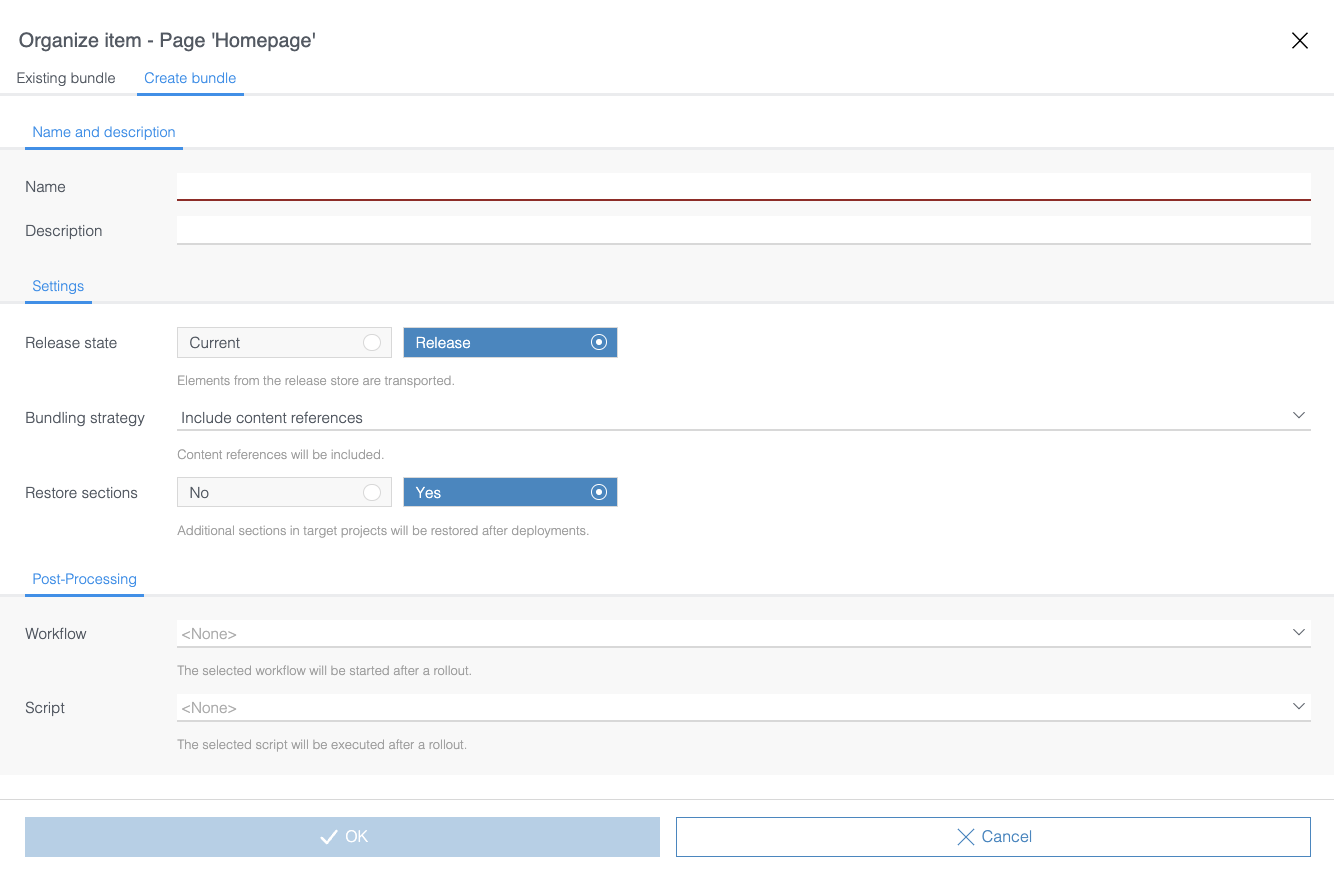
- Confirm with OK.
→ The pop-up closes. The element is located in the created bundle.
Name and description
Name: Set a name for the new bundle. This is a required field.
Description: The description will help you to identify the bundle later.
Settings
Release state
Select the required state of the element.
- Current: Current editing status of the element
- Release: The last released state of the element
Bundling strategy
The bundling strategy is used to determine which additional elements, which the selected element refers to, shall be automatically added to the bundle. This reduces the manual effort required to create a complete bundle.
- None: An automatic packing strategy is not applied. Only manually added elements are transported.
- Include content references: Necessary content is added to the package. Templates are not added automatically.
- Include outgoing references: Outgoing content is added to the package recursively. Templates are also added automatically.
Example: The user manually adds a page reference from the navigation to the bundle and selects the Include content references wrapping strategy. During the rollout, the bundle is automatically completed with the associated page and media referenced by the page. Page templates and paragraph templates are not automatically added because of the Include content references wrapping strategy settings.
Restore sections in target project
The option Restore sections determines whether additional paragraphs that exist solely in the target project should be restored after the bundle is rolled out.
This option is enabled by default. If the option is disabled, additional paragraphs are deleted during the transport and must be restored manually if needed.
Post-processing
Workflows
Workflows are a core element of FirstSpirit. Default workflows, e.g. the release process for elements, are always included in FirstSpirit.
Example: When content arrives in the target project using Multisite Management, the editor responsible for the target project is automatically notified, and the approval process is started.
If workflows already do exist for your project, you can select one in the dropdown.
Script
Scripts are simple programs that are started on a specified event and run through entirely. Scripts are distributed to the target project as part of the bundle and started there automatically.
Example: When content is delivered from corporate headquarters to branch offices using Multisite Management, a script specifies that it be distributed automatically.
Scripts can be combined with workflows.
Example: When content is delivered from corporate headquarters to branch offices using Multisite Management, a script specifies that it is automatically distributed, and then the translation workflow is started.
A script can also be used to check and apply local settings.
Example: The script is started only if a target project is locally configured to distribute content automatically. If content is not automatically distributed, the script is not started; the translation workflow is started instead.
If scripts have already been created for your project, you can select one in the dropdown.
Adding schemas and table templates to a bundle
When adding data sources and data sets to bundles, you have to manually add the associated schemas and table templates if you want to transfer them as well.
To add a schema or table template to a bundle using the Include content references or Include outgoing references strategy:
- Add the appropriate data source or data set to a bundle.
- Open the Multisite Management main application.
- Open the corresponding bundle.
- Add the schema or table templates to Current elements as described here. Schemas and table templates are technical elements and are displayed via
 .
.
→ The schemas or table templates are now transported along with the data source or data set.
Creating and editing a bundle
- Click
 in the main menu.
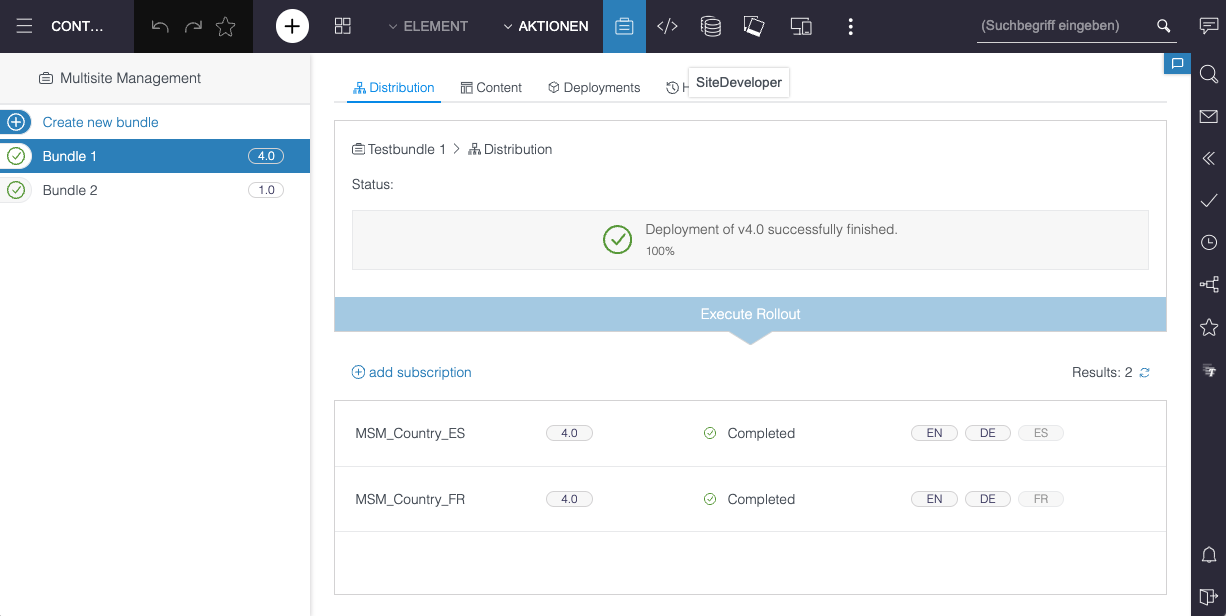
→ The Multisite Management main application opens. - In the bundle overview, select the bundle that you want to edit.
→ The selected bundle's settings are displayed in the right pane.
Creating a new bundle
You can create and configure a new bundle in the main Multisite Management application. You can add the bundle content later.
- Click Create new bundle.
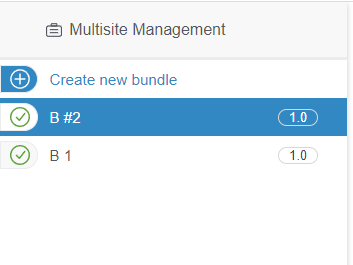
→ A pop-up with the bundle settings opens.
Editing the bundle settings
- In the bundle entry, select Settings.

→ A pop-up with the bundle settings opens.
Adding a target project
A bundle must have at least one target project assigned to it in order to transport content.
- In the Distribution tab, click add subscription.

- Select a target project from the dropdown.
→ The target project is linked to the bundle. - If a newly added target project does not appear immediately, click
 .
.
→ The target project is displayed in the list.
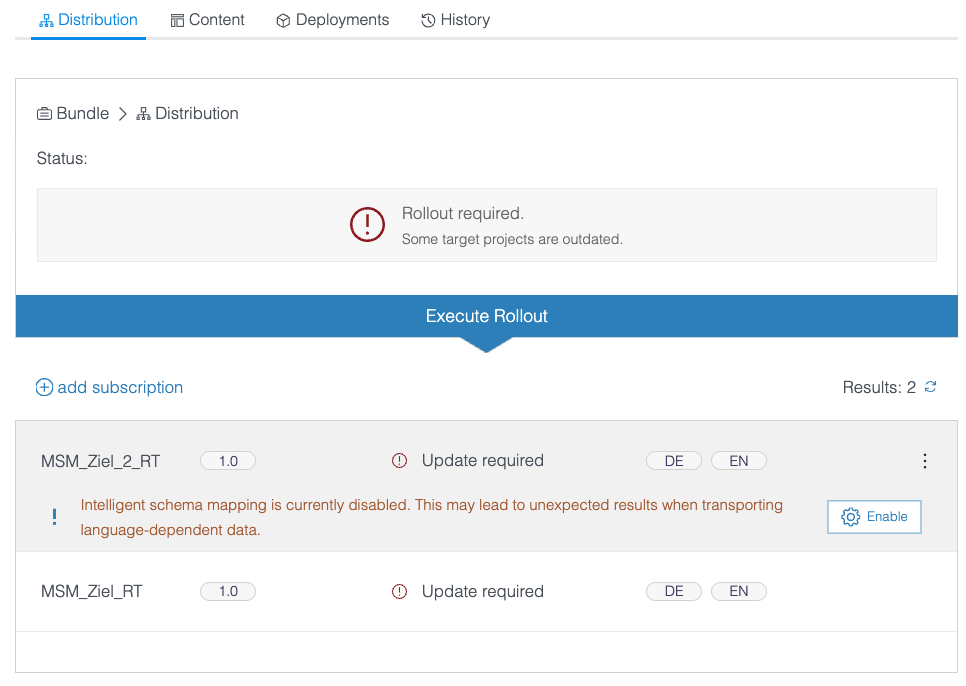
Crownpeak recommends enabling the Intelligent Schema Mapping function. To use the function, it must be enabled by the project administrator either in the ServerManager or directly in the Multisite Management main application via the Enable button.
The Enable button is only visible for project admins.
Deleting a target project
- In the Distribution tab, click Delete in the target project entry.

→ The target project is deleted. - If a deleted target project is still displayed, click
 .
.
→ The target project no longer appears on the list.
Editing bundle content
A bundle consists of elements that you have added to the bundle manually and elements that are added automatically. You can edit the bundle content by adding more elements or removing elements.
Filtering content
When searching for individual elements in order to remove or edit them, you can filter the list by element type. For each element type, the number of found results is displayed.
- Click a type in the Content tab to apply the filter.

→ Only bundle content with the selected element type is displayed in the list below the filter.
Resetting filter
- Click the selected filter entry again, or click Show all types to view all elements in the bundle.
→ All of the bundle's elements are displayed.
Adding related elements
- In the Content tab, select an element in the Current elements section and click
 .
.
→ The Related elements area opens on the right side. Elements that are related to the selected element are displayed here.
The display of the elements depends on the "Release state" in the bundle. - Click
 .
.
→ Related technical elements are additionally displayed in the Related elements area. - Optional: The list of related elements is not automatically updated after potential changes to the elements. To update the list, click the Refresh button.

- In the Related elements area, hover over an element and click
 .
.
→ The element is part of the bundle content. The element is displayed in the Current elements area and disappears in the Related elements area.
Elements from remote projects are always filtered out.
Deleting bundle content
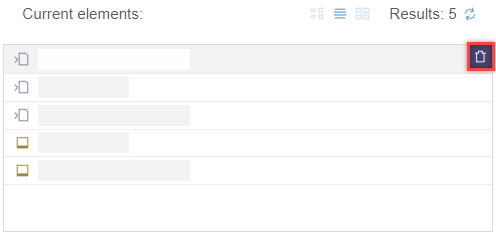
- In the Content tab, hover over an element in the Current elements area and click
 .
.
→ A pop-up opens. - Click Delete to confirm that the element shall be deleted from the bundle.
→ The pop-up closes. The element is no longer part of the bundle. - If a deleted element is still displayed, click
 .
.
→ The element no longer appears on the list.
Deleting bundle
- In the bundle entry, select Delete.

→ A pop-up opens. - Click Delete to confirm that the bundle shall be deleted.
→ The pop-up is closed. The bundle is deleted.
Distributing bundle
When the bundle is ready, it can be distributed to one or more target projects.
At least one one target project must be selected in the Distribution tab.
Distributing bundle into all selected target projects
If you have not yet distributed the completed bundle to a selected target project, a note appears in the Status field of the Distribution tab and in the target project entry.
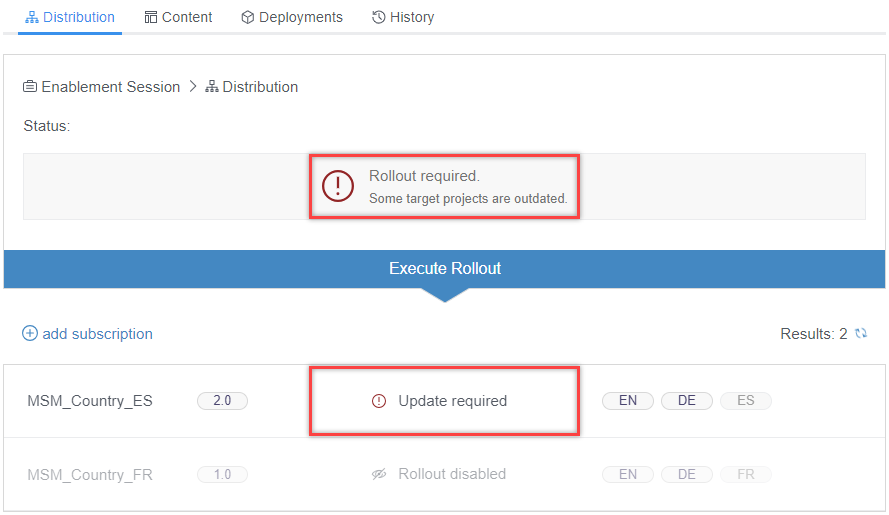
- Click Execute Rollout.
→ The bundle is distributed to the selected target projects.
The progress is displayed in the Distribution tab in the Status field and in the Deployment tab with the Active status.
Excluding target project from rollout
- In the Distribution tab, click Disable rollout in the target project entry.

→ The target project is displayed as inactive. The bundle is not distributed to inactive target projects. - Click Enable rollout.
→ The target project is active again. The bundle will be distributed to this target project the next time.
Versioning
A bundle's current version is displayed in the bundle overview:

Automatic bundle version changes
If a bundle has been rolled out and an element is added to it hereafter, the bundle's major version is automatically upgraded: e.g. version 2.3 → 3.0
Editing bundle version manually
When a bundle's version number changes automatically, this reflects added or deleted elements. Changes to the content of the elements are not reflected. Manually editing a bundle's version number can indicate that it needs to be rolled out soon.
Example: After a change in legal information, the bundle must be rolled out again. This content change is not reflected by any automatic change to the version number. By manually editing the version number, this change is pointed out.
- Click Bump version.

→ A pop-up opens. - Select the part of the version number that should be upgraded, Minor (e.g. 2.0 → 2.1) or Major (e.g. 2.3 → 3.0), and confirm with Save.
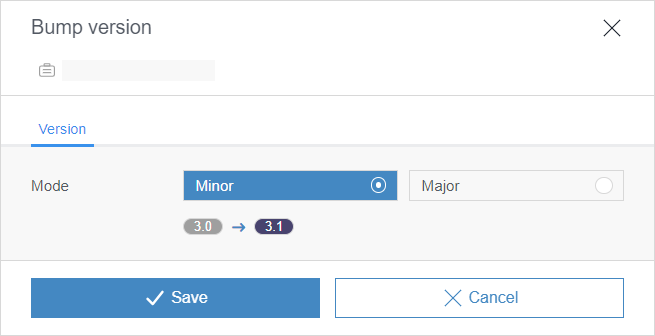
→ The pop-up is closed. The version of the bundle is upgraded.