
User documentation – Development Tools in ContentCreator
Concept
Development Tools in ContentCreator primarily aim to help project developers in completing easy development tasks fast and comfortably from within ContentCreator.
This includes mainly small changes in forms, the modification of rules, or correction of errors in output channels.
Editing templates
Developers can edit the following properties:
Overview
Preview
You can access and edit a page, section, or dataset template in the toolbar:
Fullscreen view
You can access the fullscreen view of Development Tools in ContentCreator via the ContentCreator's main toolbar. In the fullscreen view you can create and move templates, manage folders, and edit all templates, including such that are not accessible in any preview (e.g. link templates, format templates).

If you have introduced any changes to a template you previously opened and have not yet saved the changes, the next template you open will appear in a new tab. This enables editing several templates simultaneously.
Media management
You can edit text files directly in the media management.
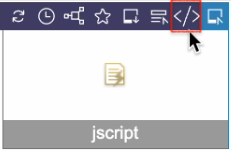
→ A window opens for editing the text file media. Here you can edit the file directly.
The editing of language-dependent text file media is also supported.
Actions
FirstSpirit online help
The FirstSpirit online help is available to you both in the SiteArchitect and in the Development Tools in ContentCreator. This allows you to directly retrieve documentation on keywords in templates or HTML code.
In a template or in HTML code:
- Select a keyword.
- Right-click on the selected keyword.
→ A context menu opens.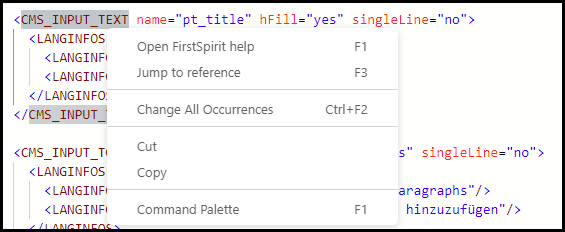
Alternatively: PressF1. - Click "Open FirstSpirit help".
→ The documentation corresponding to the selected keyword is opened in a new browser tab.
Form
In the Form area, you can create or edit forms. To do this, you can choose from three view types:
|
|
GOM UI only |
|
|
Parallel view: GOM UI and XML editor |
|
|
XML editor only |
The selected view is being saved. The settings refer to the current server and is stored in the browser cache.
GOM-UI
In the GOM UI view or in the parallel GOM UI/XML editor view, you can select new input components from the Available components list on the left and input them using drag&drop into the form on the right, or move input components within the form: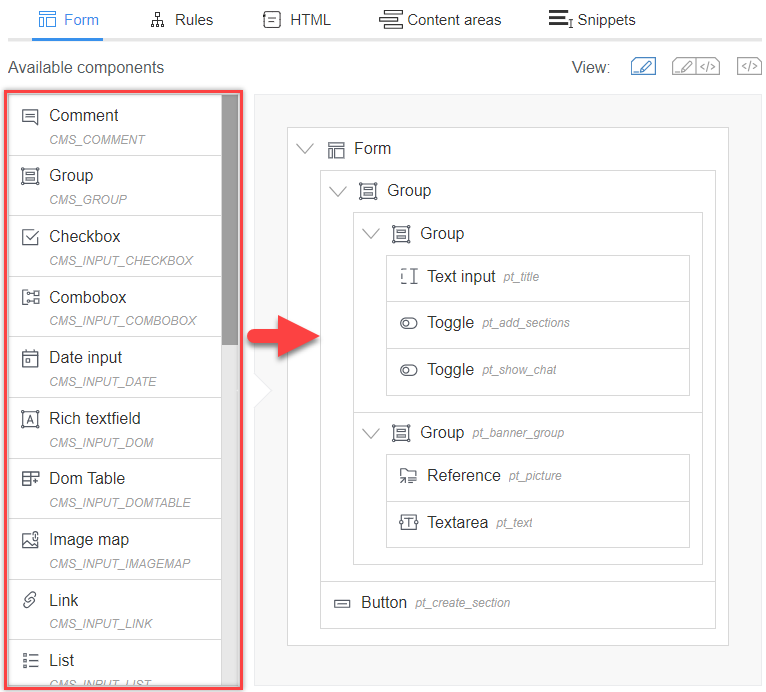
In the GOM UI you can only edit the input components' titles: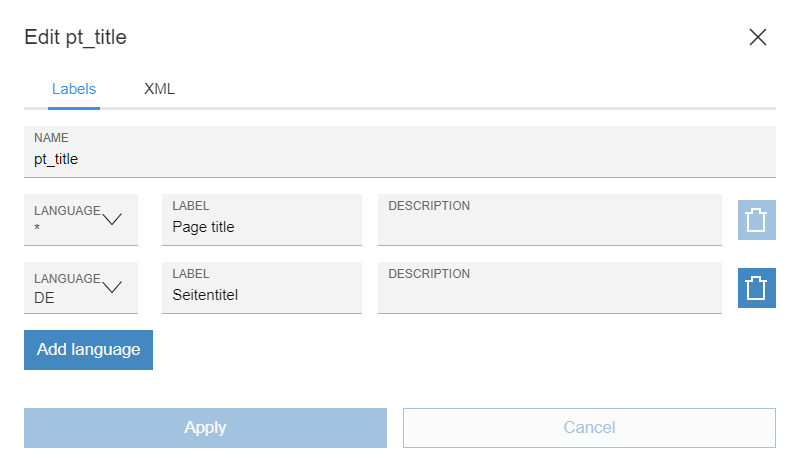
- In the parallel GOM UI/XML editor view, click on an input component.
→ In the XML editor, the XML area representing the input component is highlighted.
- Fallback values are used as default values precisely when no value has been stored in the input component and a default value has not been defined for a language.
- Default values can be defined per language.
Form preview

- Click Open preview.
→ A pop-up opens. Here you can check the form resulting from the template and your changes before saving.
Auto completion in the XML editor
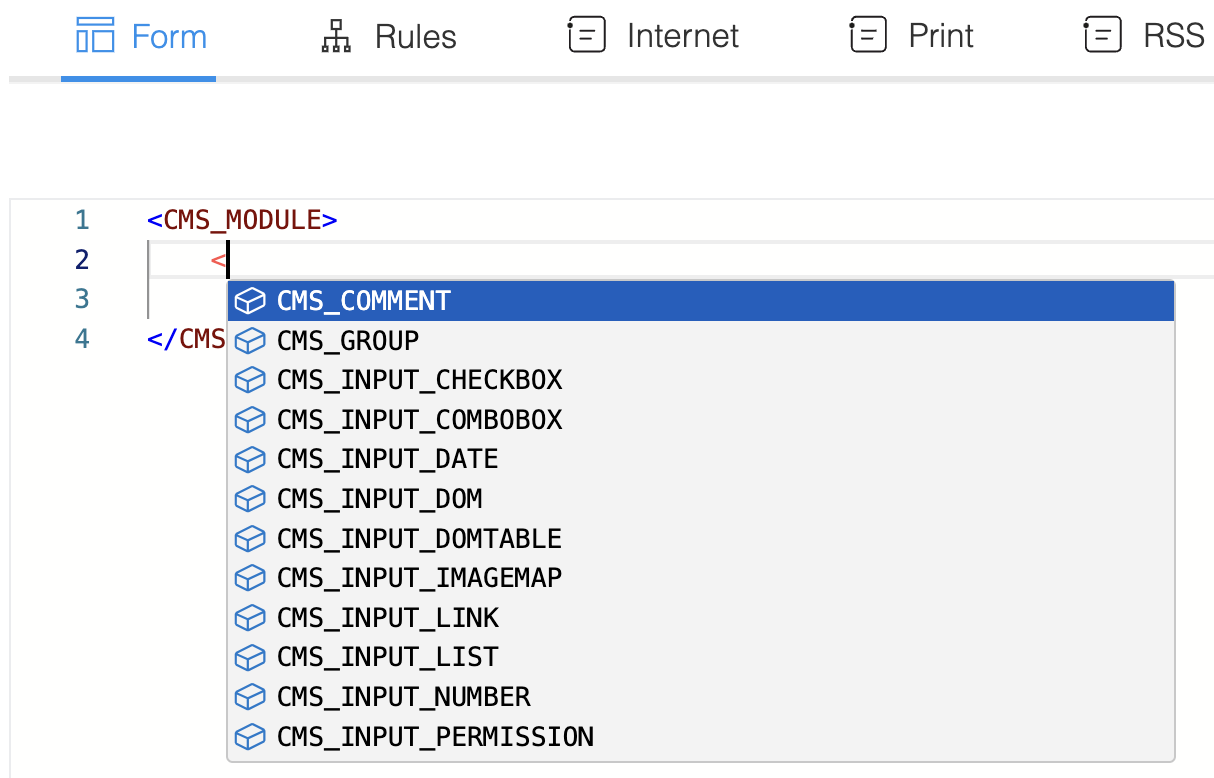
- Press
Ctrl+Spacewhen editing a form or a rule.
→ Code suggestions with possible input components and definition tags display and can be selected.
Ctrl + Space also yields matches such as <CMS_INPUT_DOM> and <CMS_INPUT_DOMTABLE>.Rules
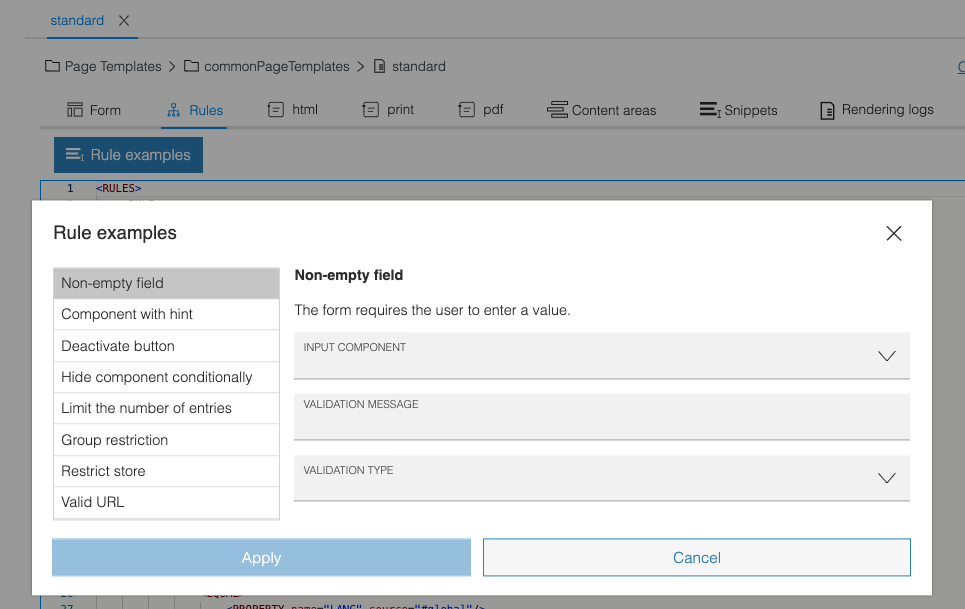
A template developer can defined rules within the (form) template that affect certain elements or properties of the form and in so doing create a “dynamic form”.
Common use cases can be applied with the rule examples in a simple manner.
Output channel
Emmet coding for HTML output channels and CSS media files
Emmet coding is a shorthand syntax for writing HTML and CSS quickly and efficiently. It allows developers to create code with less key strokes.
Example: 
- Press
Ctrl+Spacewhen editing an output channel.
→ Code suggestions with the FirstSpirit template language and HTML display and can be selected.
Result:
<ul id="nav">
 <li class="item1">
   <a href="">Item 1</a>
 </li>
 <li class="item2">
   <a href="">Item 2</a>
 </li>
 <li class="item3">
   <a href="">Item 3</a>
 </li>
</ul>
Extend table templates
- In the Mapping area, click Create new database column.
→ A pop-up opens where you can configure the column.
You can create a link to a form field, even if the form field has just been added:
- In the Mapping area, click Create new database column.
- In the Column type field select the String type.
- In the field Form field select the component to which the column shall be linked.
Manage folders and templates
In the full-screen view, you can create, duplicate, and delete folders and templates.
You can only delete templates if they are not in use.
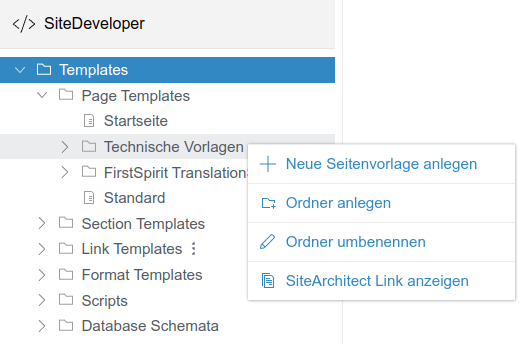
You can move folders and templates in this view using drag&drop.
Opening references
- Switch to the output channel.
- Tap F3.
Alternatively: Click on Jump to reference in the context menu.
→ If text file media are referenced, a window opens. Here, you can edit the file.
Search
In the full screen view you can perform a search in all templates: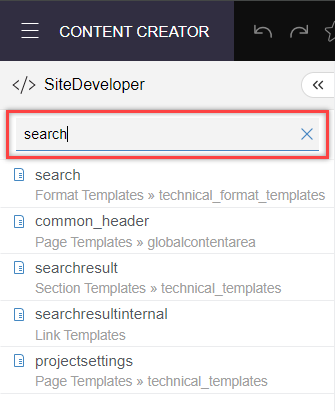
- The search does not differentiate between upper and lower case.
- A full text search is performed. Only exact search terms display.
- If a search result displays the search text within the template - form, rules or output channels - clicking on the search result opens the tab in which the search text occurs. The correct position displays in the tab. The search term is highlighted in color. All tabs in which the search text is present are highlighted in bold.
Integration with distributed template development
For FirstSpirit projects developed with Git using the Distributed template development, additional functionality is available: in the full-screen view, information on the current project, and links to Bamboo plans regarding the project display. When these Bamboo plans execute, the FirstSpirit project's status on the server synchronize with the project's status in the Git repository.
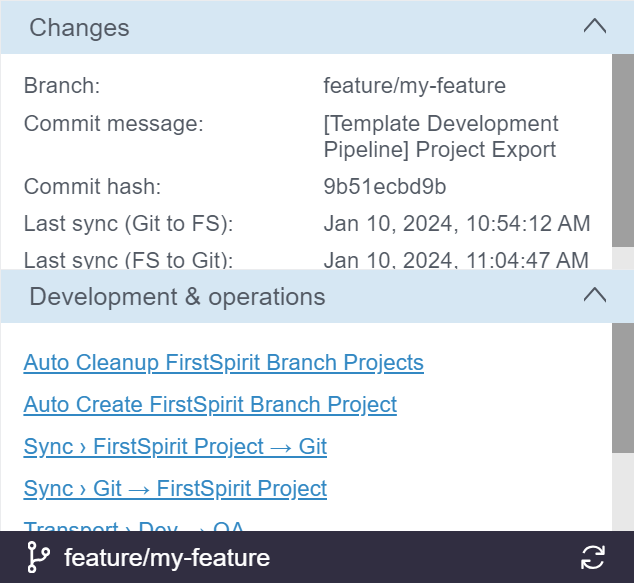
- The Changes section displays information on the current project status in Git.
- The Development & operations section displays links to the bamboo plans.
Workflows
You can model, edit, rename, and duplicate workflows directly in the ContentCreator and SiteArchitect.
Overview of all workflows
On the root node "Workflows," there is an overview of all workflows within the project, and a filtered view based on various search criteria is also possible. Within this overview, tasks can be continued or canceled.
Creating a workflow
Creating a workflow in the ContentCreator is almost identical to doing so in in the SiteArchitect:
- In the Development Tools side menu in the ContentCreator (full screen view), click on Create new Workflow in the context menu of the desired workflow folder .
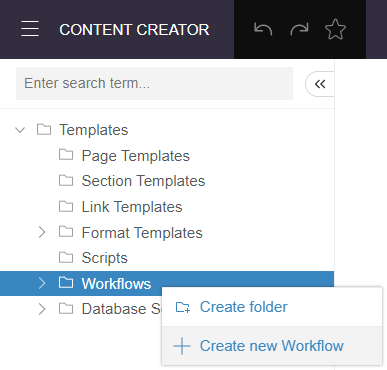
- Assign a unique display name and reference name. These are displayed to the editor when the workflow is executed.
- Click Save.
Once you have created a workflow, you can delete, rename, or duplicate it or display the SiteArchitect link:
- In the sidebar menu of the Development Tools in ContentCreator, click on the desired workflow.
→ A context menu will open.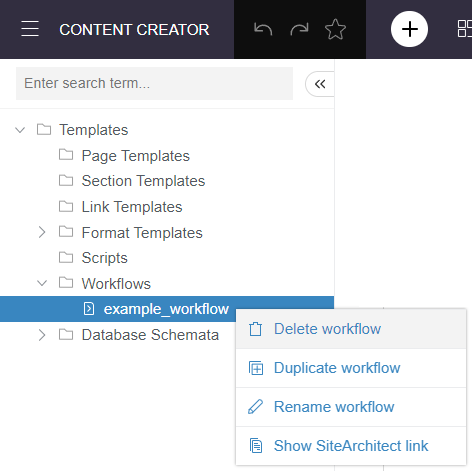
- Select the desired action.
Editing a workflow
Various tabs are available for editing a workflow in ContentCreator:
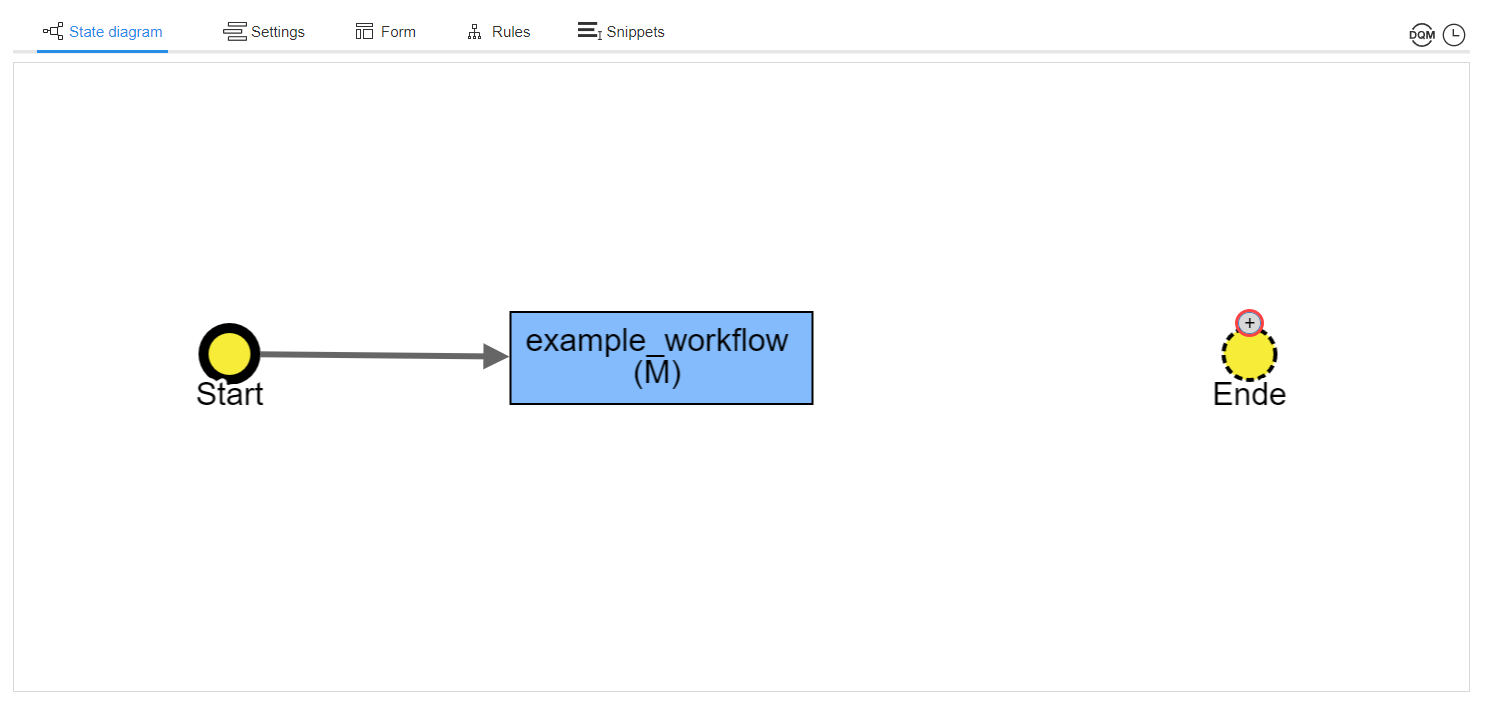
State diagram tab
In the tab State diagram, you have the option of modeling workflows using a graphical editor.
Three object types are available within the editor:
Modeling a workflow using the state diagram:
- Creating an activity or status: Right-click on any area in the editor. A context menu appears. You can create a status or activity using the corresponding option in the menu.
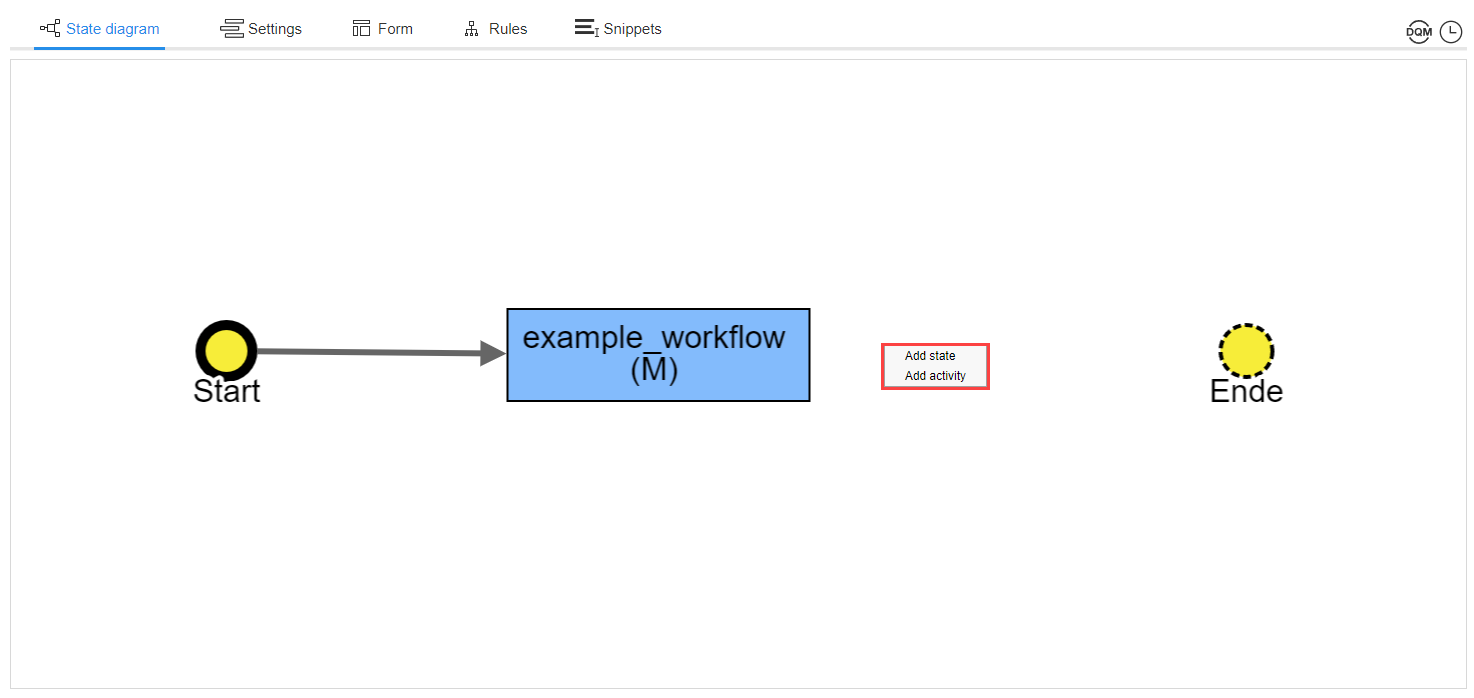
- Deleting an activity, a status or a transition: Right-click on the desired element. A context menu appears. Select the corresponding option in the menu.
- Edit an object: Double-click on the desired object. A new window opens.
- Create a transition: Click on the plus symbol that appears when hovering over a status or activity. Hold it and drag the arrow that appears to the desired destination.
Database schemata
You can model and edit database schemata directly in the ContentCreator.
In the ContentCreator, tables of a database schema display in a list. Information about each table is presented in a table. The ContentCreator doesn't support the FirstSpirit Schema Editor.

Creating a new schema
- In the page menu of the Development Tools in ContentCreator, click Create Schema in the context menu of the Database Schemata.
Templates > Database Schemata > Create schema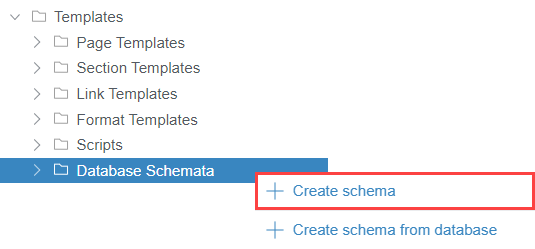
Alternatively: Click Create schema from database to create a schema node based on existing tables and database relationships. - Enter reference name and database layer.
- Click Save.
Creating a new table and column
- Click on a database schema.
- Click Add table.
- Enter a table name in the field with the same name.
- Click Apply.
→ A new table is created. - Optional: You can rename or delete a table:

- Click Add column.
- Provide the necessary information .
- Click Apply.
→ A new column is created. - Click Save changes.
Create a foreign key relationship
- Select a table from a database schema.
- Click Add foreign key.

- Provide the information needed to create a foreign key relationship.
- Click Accept to complete the process.
→ Foreign key relationships are marked as links. These take you to the linked table. - Click Save Changes.
Database queries
You can create and customize database queries in the ContentCreator.
Usage example: A database query is used to create two news overview pages with differing content that is dynamically retrieved. The query filters the "News" table for the "Company news" or "Industry news" category.
Creating new query
- In the side menu of the Development Tools in ContentCreator, click on Create new Query in a schema's context menu.
Templates > Database Schemata > [schema name]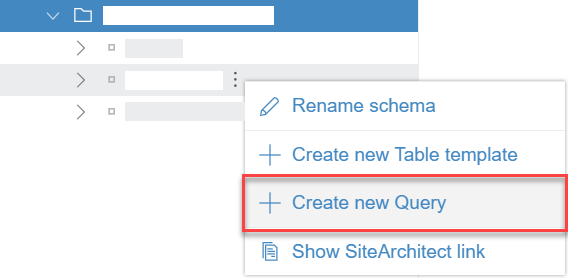
- Select the result table and save the query.
→ The query appears under the name [schema name].[reference name] in the menu structure of the schema. The query opens immediately.
Editing a query
- Select the required query in the side menu of the Development Tools in ContentCreator.
Templates > Database schemata > [schema name]
→ The query opens. - In the Constraints tab you can view and edit the query in the graphical view Combination wizard.
- In the Parameters tab you can define the values of parameters that are used in the Constraints tab.
- In the Results tab you can view the query's results.
Optional: Double-click a result to open its detailed view.
Optional: Activate the Release state checkbox to limit the query's results: only published results appear.
Rendering log
You can view data about the generation of page, paragraph, and table templates in the Rendering log tab both in the full screen view and in the dialog box.

The rendering log consists of two areas:
- Rendering log
Here you can find potential form-specific error messages and warnings. The listed links take you directly to the corresponding line of a form. - Profiling log
In this table, you can find form-specific information about the number of executions (Count) and render time (Total Amount, Min, Max , Average in milliseconds). Click on the form name in the Name column to go directly to the form.
In full screen view, the information provided in the rendering log relates to the form preview selected in SiteArchitect. In the dialog box, the information shown relates to the preview currently displayed in the ContentCreator.
For projects with more than one output channel, you can retrieve channel-specific information:
- Open a form in the Development Tools in ContentCreator.
- Select the appropriate output channel from the drop-down menu.

→ The rendering log displays specifically for the selected channel.
Version history
In the version history you can view and compare different versions of a template.

The versions display with information about their date and time of saving, the editor, and different status icons:
|
|
Initial version |
|
|
Edited version |
|
|
Restored version |
Filtering
- Activate the Display only own revisions checkbox.
→ Only versions saved by you display.
Compare different versions
Compare with current version
- Click on a version.
→ The version is selected. - Click the Compare with latest version button. → A pop-up opens. The selected version and the current version display side by side. The differences between the versions are highlighted.
Comparing two versions
- Click on a version.
→ The version is selected. - Click on a second version while pressing and holding
CtrlorShift
→ The second version is selected. - Click Compare.
→ A pop-up opens. The selected versions display next to each other. The differences between the versions are highlighted.
Ctrl and click on the same version again.In the pop-up you will see only tabs that do have differences between the versions.
You cannot edit anything in the pop-up.
Restoring a version
- Move the mouse over a version.
- Click
 .
. - In the pop-up click Confirm.
→ The version moves to the first position in the history and receives the current timestamp.
