

Prompt administration
Operations are the unit of work for every AI assistant in FirstSpirit. This page is the single reference for configuring them: defining what operations exist, which assistants display them, how scope is set across projects, and who can edit what.
Prompting levels and edit rights
Prompts are organized into levels. The level at which a prompt is defined determines its scope and who can edit it.
| Level | Scope | Who can create and edit |
|---|---|---|
| System prompt | Applied during every operation execution | Server admin (on-premise solution only) |
| Global prompt | All projects on the server; cannot be edited at project level | Server admin (on-premise solution only) |
| Shared prompt | All projects on the server; can also be edited at project level | Server admin or project admin |
| Project prompt | One project only | Project admin |
Operations and options at a given level are visible under that level and all child levels. For example, under Shared Prompts, both shared and global operations are displayed.
Accessing the prompt configuration
Only server and project admins can access the AI configuration. The tabs and levels visible in this window depend on your user rights, see Prompting levels and edit rights.
To configure prompts in the ContentCreator:
- In the ContentCreator, click Actions.
- Click Open AI Configuration.
→ The Edit prompt configuration window opens.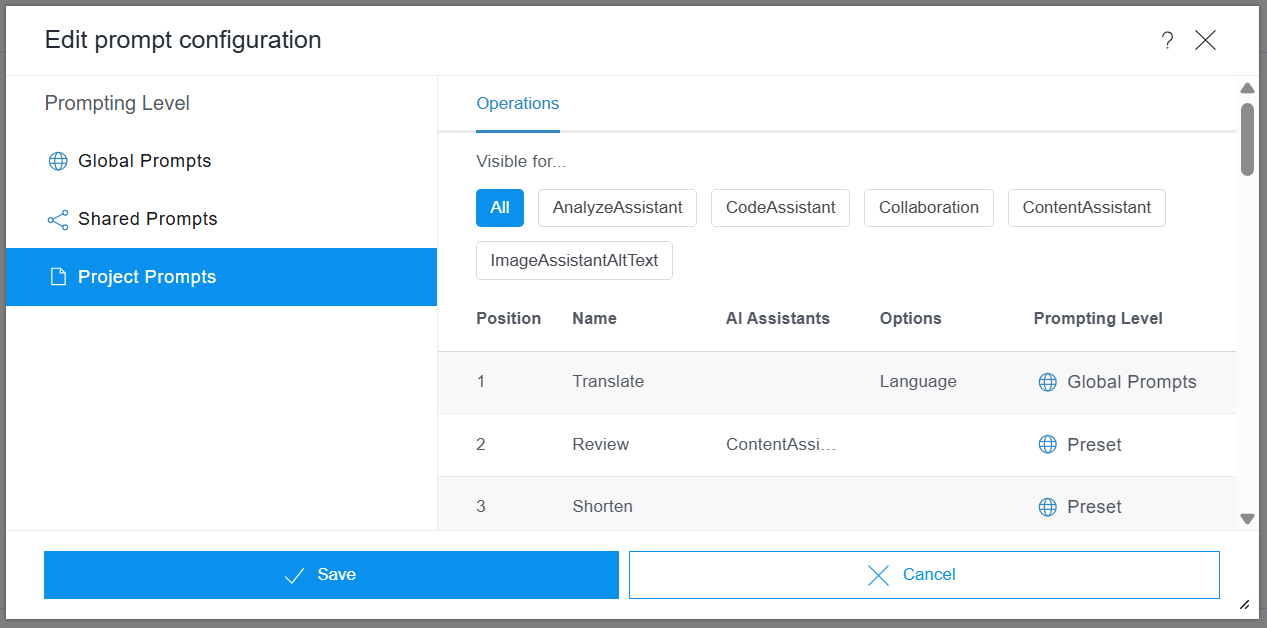
To configure prompts in the ServerManager (on-premise solution only):
Server admins configure prompts in the FirstSpirit AI Configuration service:
- Navigate to ServerManager > Server > Properties > Modules.
- Enable Show Services and enter "AI" in the search field.
→ The FirstSpirit AI Configuration service appears in the results. - Select the service and click Configure.
→ The configuration window opens.
Project admins configure shared and project prompts in the FirstSpirit AI Configuration ProjectApp:
- Navigate to ServerManager > Project > Properties > [Project selection] > Project components.
- Select FirstSpirit AI Configuration ProjectApp.
- Click Configure.
→ The configuration window opens.
Managing system prompts
System prompts run during the execution of every operation. They ensure correct interpretation of input and consistent generation of output. They are not visible to editors.
System prompts can be viewed and edited by server admins only.
System prompts are of the following types, shown in the Type column:
- Preset: FirstSpirit-provided defaults. Cannot be deleted.
- Preset (Modified): A FirstSpirit default that has been edited by a server admin.
- Custom: Added and defined by a server admin.
Edit a preset system prompt
- Under System prompts, select a prompt of type Preset.
- Click Edit system prompt.
→ The edit window opens. - Edit the prompt.
- Click Apply.
→ The prompt is marked Preset (Modified) in the Type column.
Reset a modified system prompt
- Under System prompts, hover over the modified prompt.
- Click Restore system prompt preset.
→ The prompt is marked Preset again in the Type column.
Add a custom system prompt
A custom system prompt is required when calling the FirstSpirit AI API from a custom script or module action.
- Under System prompts, click Create system prompt.
→ A new window opens. - In the Name field, enter a descriptive name, for example "MyCustomAssistant: System". This name is used in the custom script to reference the prompt.
- In the Prompt field, enter the prompt.
- Click Apply.
Duplicate a system prompt
- Under System prompts, hover over the prompt.
- Click Duplicate system prompt.
→ A new window opens. - Change the Name and, if required, the Prompt.
- Click Apply.
Delete a custom system prompt
- Under System prompts, hover over the custom prompt.
- Click Delete system prompt.
Managing global, shared and project prompts
Global, shared, and project prompts consist of the following configurable parts:
- Operations: An operation is a task that is executed in one of the assistants or in a custom script.
- Options: You can assign an option to one or more operations. Options allow you to amend the task with predefined values.
- Tags: Use tags to assign processes and options to one or more assistants or custom scripts. You can customize tags at all levels to manage the visibility of operations and options for users.
- Functions: Allow FirstSpirit AI to access one or more functions of configured function servers via plugins, e.g., the MCP Connector Plugin, and use the corresponding data in content creation.
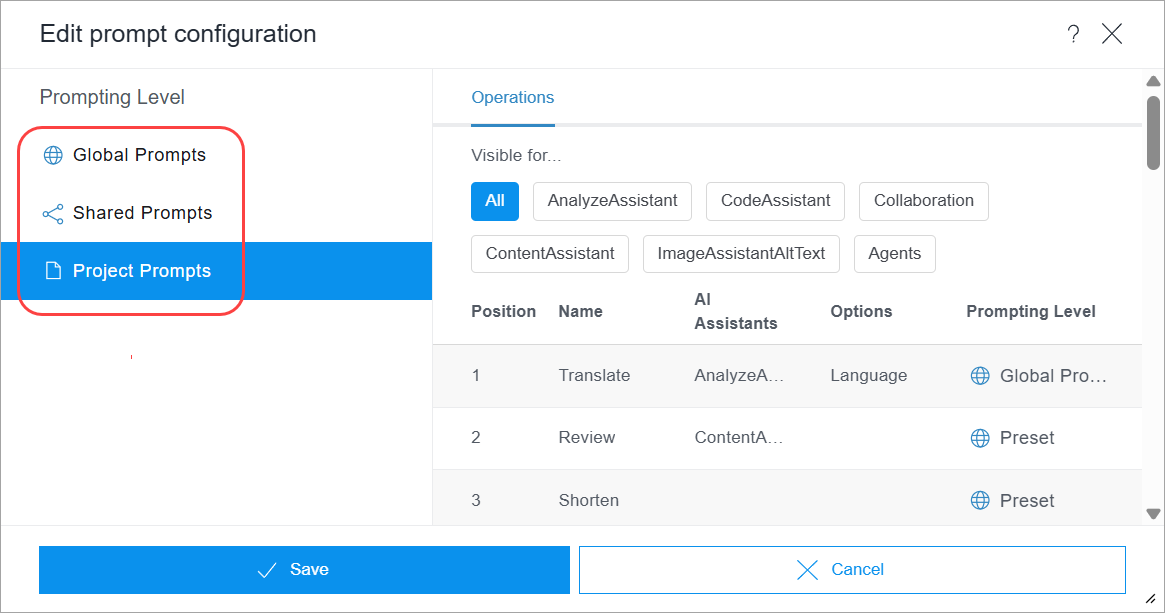
The following actionable items are identical for global, shared, and project prompts:
- Changing the visibility of list items
- Adding an operation
- Testing an operation
- Adding an option
- Editing an existing operation or option
- Duplicating an operation or option
- Moving an operation or option
- Deleting an operation or option
- Activating a function
Additionally, the following prompting-level specific actions are available to you:
The displayed list provides the following information by default:
- Position: The display position of the operation that the end user also sees when selecting an operation
- Name: The name of the operation that the end user also sees when selecting an operation
- AI Assistant: The assistants to which the operation is assigned
- Options: The options assigned to the operation
- Prompting Level: The level at which a prompt has been defined
Changing the visibility of list items
The visibility is set to "all" by default, meaning that all operations and options are displayed in the list regardless of which assistant they are assigned to.
To change the visibility of list items:
- Select which assistant you want to view the visibility settings for, e.g., Content Assistant.
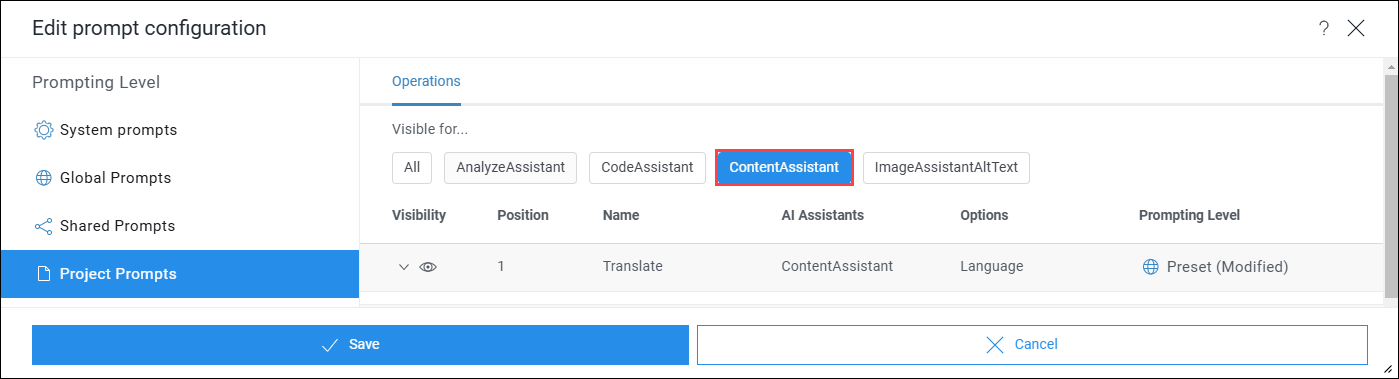
→ The Visibility column appears. This indicates which operations are shown to the end-user when using the Content Assistant. Other prompts will still be displayed in the list but will be grayed out. - Optional: Change the visibility setting of an entry to display or hide it when using the Content Assistant. Use the drop-down menu in the Visibility column in the row of the corresponding entry.
Adding an operation
- In the Edit prompt configuration window at the desired prompting level, click Create operation.
→ A new window opens where you can define the new operation.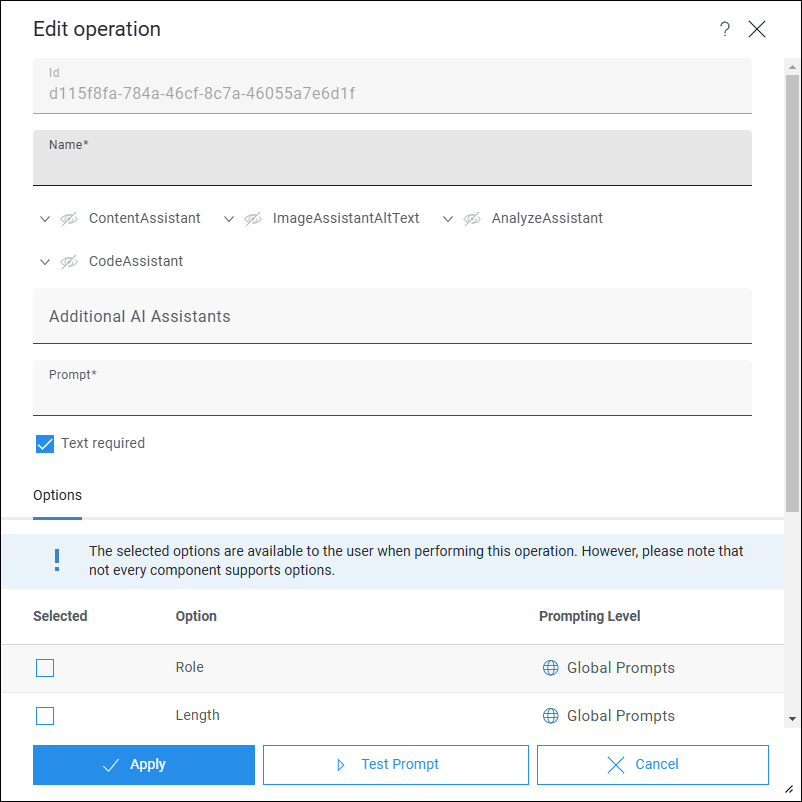
- Enter a name for the operation in the Name field. This name will be displayed to the user in the ContentCreator.
- (De-)activate the visibility for each assistant or custom script or module actions in which a user should be able to use this operation.
- Optional: Create a new custom AI assistant in the Additional AI Assistants input line.
→ The operation will be directly assigned to the new assistant. This must also be evaluated accordingly in the custom script or module. - Enter your prompt in the Prompt field.
You can find more information about prompt creation in Better results with AI and Writing prompts. - Optional: Activate the checkbox Text required if your prompt uses input text.
- Optional: Add one or more options to your prompt by checking the appropriate boxes under Options.
- Optional: Click Create option to add a new option.
- Optional: Activate a function to allow the use of it in the operation.
- Optional: Test your operation.
- Click Apply to save your changes.
Testing an operation
- Choose an operation and click Edit operation.
→ A new window opens. - Click Test Prompt.
→ A new speech bubble opens.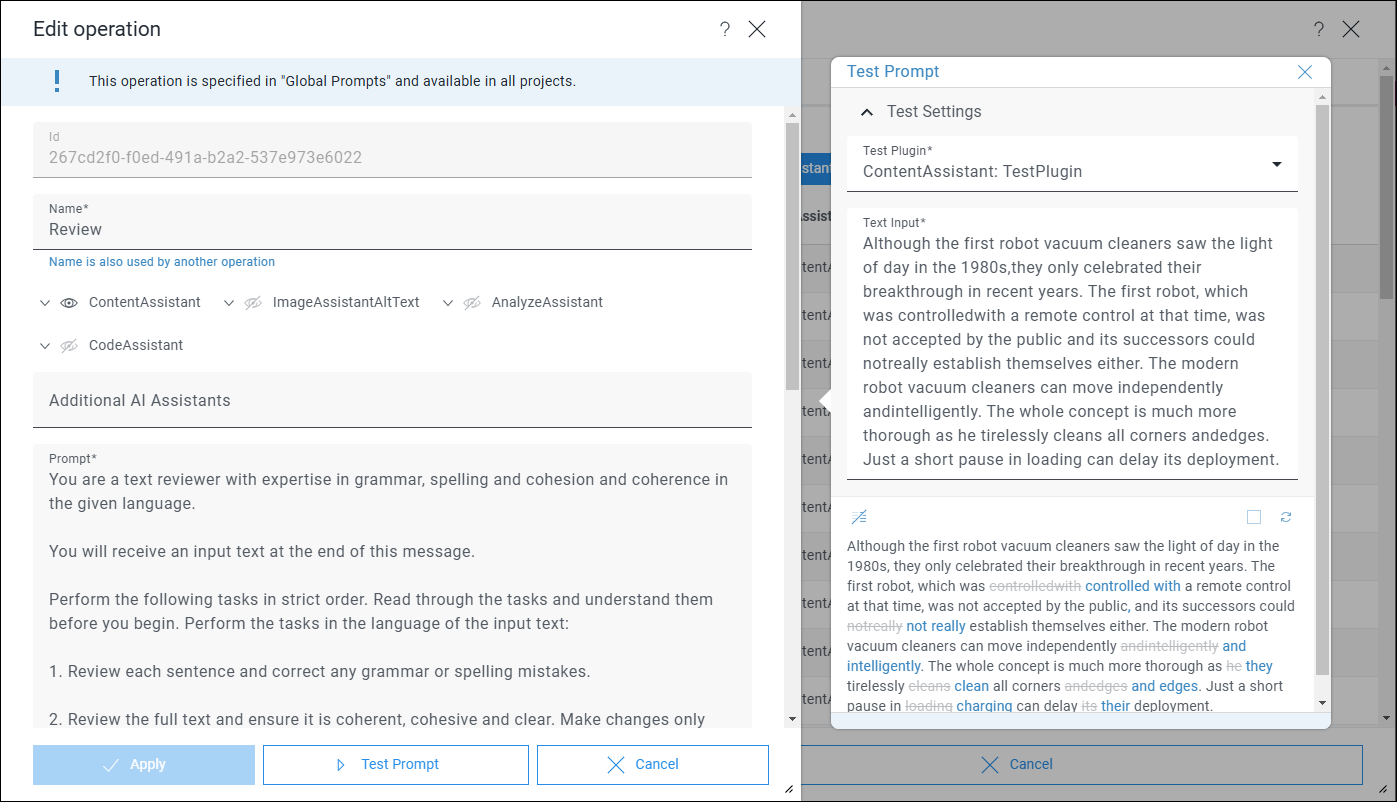
- Expand the Test Settings.
- Choose a Test Plugin to test your prompt in a specific environment, e.g., Content Assistant: TestPlugin to test your prompt for use in the Content Assistant.
→ The text in the Text Input field changes based on the chosen test plugin. - Optional: If the operation to be tested has an assigned option, select an option value to test.
- Optional: Edit the text in the Text Input field.
→ Based on your prompt and the provided example text, the generated text will be streamed in the bottom field. - Optional: Edit your prompt in the Prompt field if the API response was unsatisfactory and test it again.
Adding an option
Depending on the level at which you add an option, it can only be assigned to corresponding operations. For example, an option defined at the project prompt level cannot be assigned to a global prompt.
- In the Edit prompt configuration window, click Create option.
→ The Edit option window will open.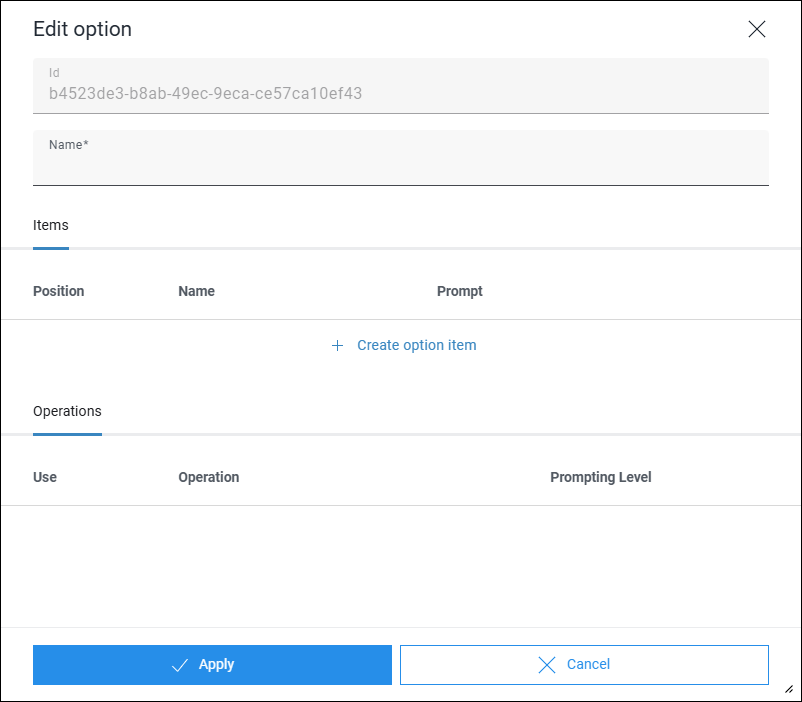
- In the field Name, enter the display name of the option.
- Click Create option item to add a new option item.
→ The Edit option item window opens.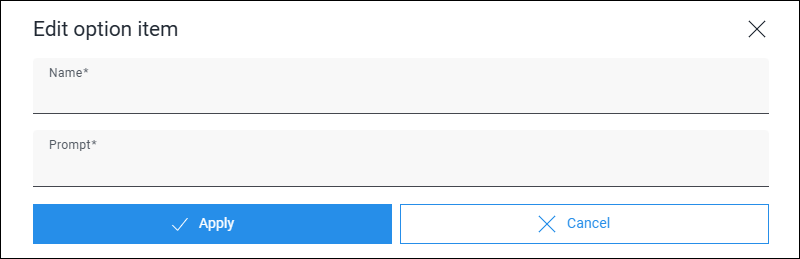
- In the Name field, specify the display name of the option value.
- In the Prompt field, specify the prompt of the option value.
This field is no longer mandatory. An entry without a prompt can be saved and does not contribute to the overall prompt during execution.
Find more information on how option prompts should be structured under Writing prompts. - Click Apply to save your changes.
- Optional: Add more entries.
- Under Operations, assign your newly added option to an operation by setting the appropriate checkboxes.
- Click Apply to save your changes.
The following behaviors apply to options in the Content Assistant:
- The first entry of an option is selected by default. An empty selection is not possible. The editor cannot reset the selection. Ensure that the first entry represents a meaningful default value.
- An option with exactly one entry is not displayed to the editor. The entry is still used and is included in the result. Recurring prompt components can thus be assigned to multiple operations without duplicating the prompt text.
- If an operation has exclusively options with one entry each, the selection in the Content Assistant is omitted entirely.
- If a selection without any effect should remain possible for an option, create an entry without a prompt, for example with the name [None], and place it at the beginning of the entry list. This entry is then preselected.
Editing an existing operation or option
- In the Edit prompt configuration window, click on the Edit operation/Edit option icon for the desired operation/option.
→ The Edit operation/Edit option window opens. - Change the display name or prompt as well as other settings.
- Save your changes.
Duplicating an operation or option
- In the Edit prompt configuration window, select an entry, either an operation or an option, and click on Duplicate
 .
.
→ The Edit operation/Edit option window opens. - In the Name field, adjust the name.
- Optional: Adjust the prompt or any other settings of the duplicated operation or option.
- Save your changes.
Moving an operation or option
Move an operation or option to change its display position:
- In the Edit prompt configuration window, hover your mouse over the operation or option you want to move.
- Press and hold the
 icon and move the entry to the desired position.
Alternatively: Click on /
/  to move the entry up or down.
 - Save your changes.
Deleting an operation or option
You can only delete operations and options at the level where they were created.
- Hover the mouse over the operation or option you wish to delete.
- Click Delete operation/Delete option.
Activating a function
Allow the use of a function from a previously configured server, e.g., MCP server:
- In the Edit operation window, navigate to the Functions section.
→ Here, all configured servers are displayed, along with the functions of each server that are allowed for use in this operation.
If none of the functions available for a server are activated for the operation, (none) is displayed in the Function column. If all functions available for a server are activated for the operation, (all) is displayed in the column.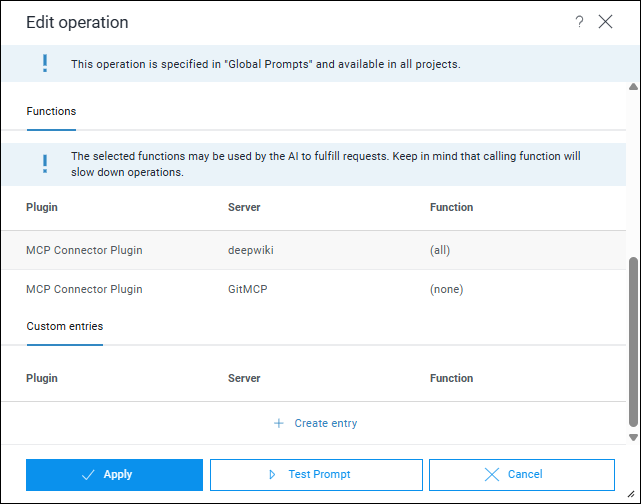
- To (de)activate one or more functions of a function server, click Edit entry.
→ The plugin window of the configured server will open. Here you can view all the functions available for the server.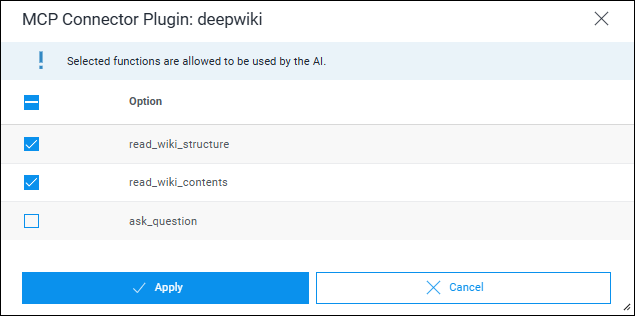
- To activate an individual function, click on the corresponding checkbox. A checkmark indicates that the function is activated.
- Optional: (De)activate all options available for a server by clicking the checkbox in the top row.
- Click Apply to save your changes.
→ The operation can now use the activated functions.
For optimal use of MCP server functions, you should observe the respective instructions provided by the MCP server.
Resetting a global operation
- Under Global Prompts, hover your mouse over the operation you want to reset to the default setting. (You can only reset entries that are marked as Preset (Modified).)
- Click on Restore operation preset.
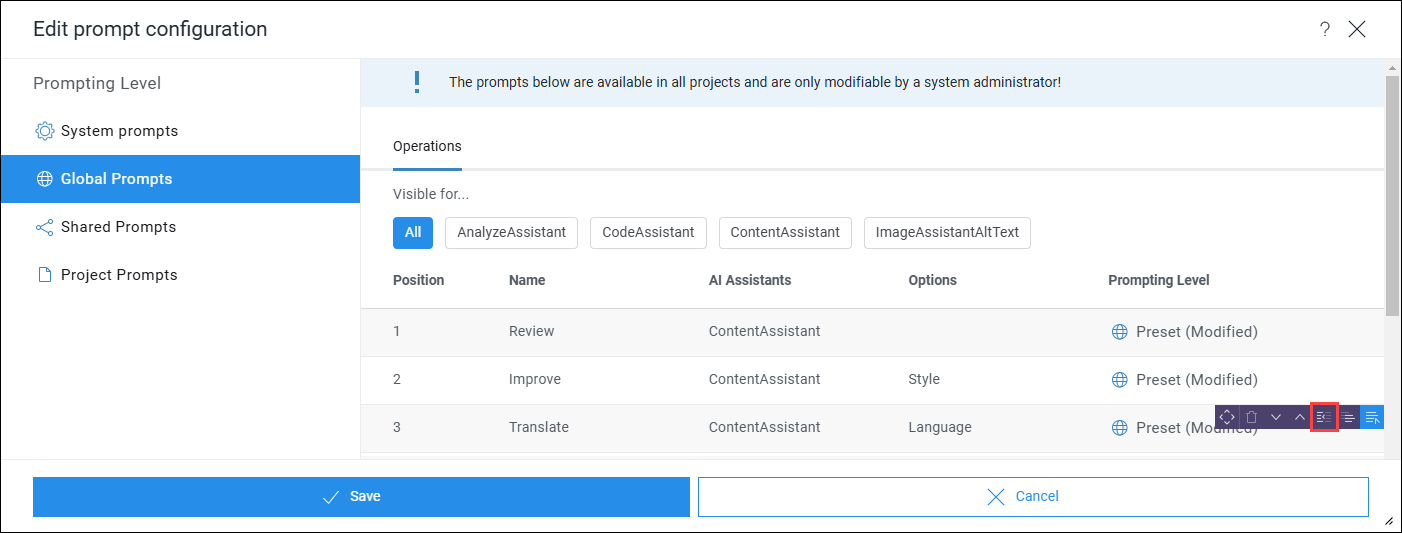
→ The reset operation will be marked as Preset again in the Prompting Level column.
Sharing an operation at the project prompt level
- Under Project Prompts, hover your mouse over the operation at the project prompt level that you want to share server-wide.
- Click on Share operation.
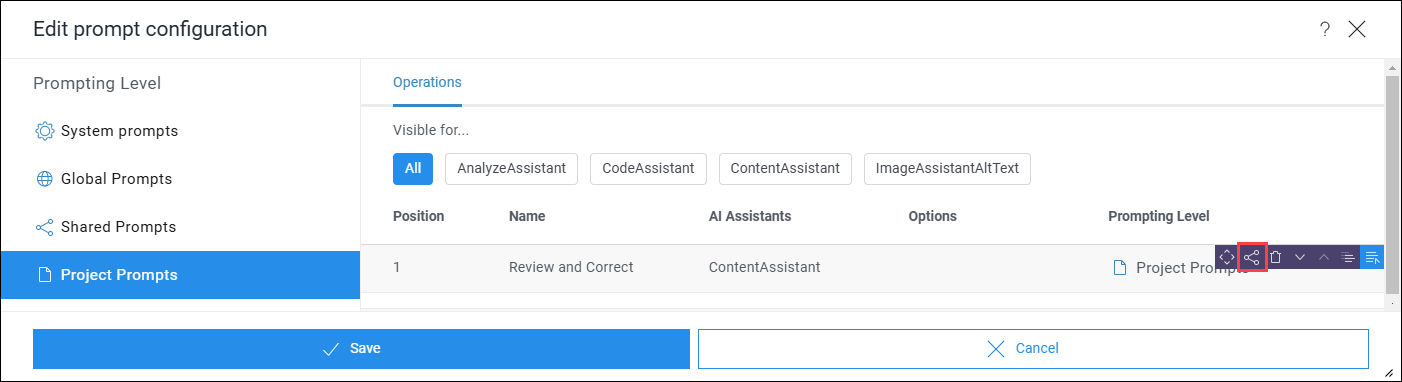
→ The operation will be marked as Shared Prompt in the Prompting Level column and can now be used server-wide.